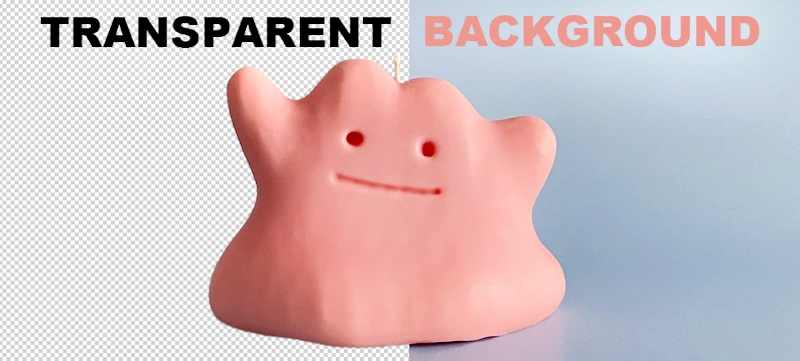
Did you land here by searching the term “make transparent background on photoshop”?
If you did, you’re in luck because this blog post is going to show you exactly how to do that
Obviously the main focus here is going to be around how to achieve a transparent background using photoshop but I’m also going to cover another nifty software that’s available on the market that (in some cases) can be much faster than photoshop depending on the subject in your image
I’ll explain more later but for now, let's just focus on how we can do this in Photoshop
Side note: My name is Thomas & I’ll be using Adobe Photoshop 2022 for this tutorial so if you’re running on an older version and things look a little different, that will be why
To update your version of Photoshop, click here to checkout Adobe’s Website
Ok, let’s get to step one, getting the right image!
Getting The Right Image
Now, before we even think about getting into Photoshop we need to make sure we’ve got a suitable image that’s going to give us a really nice clean finish.
Below is a list of the most important things to consider in order to make removing your image background a success:
1. Make sure your background is plain and as smooth as possible.
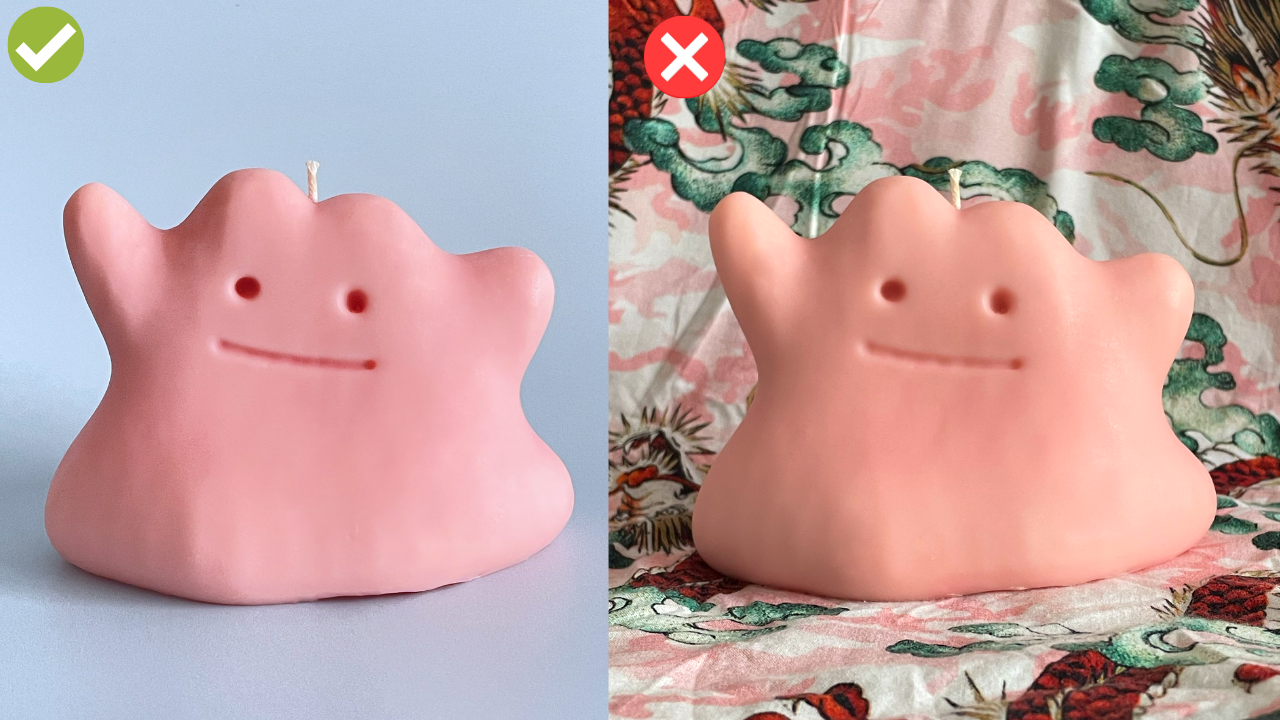
If your background has lines or patterns they can sometimes get mistaken by photo editing softwares as part of the subject which ultimately just makes more work for yourself in the end.
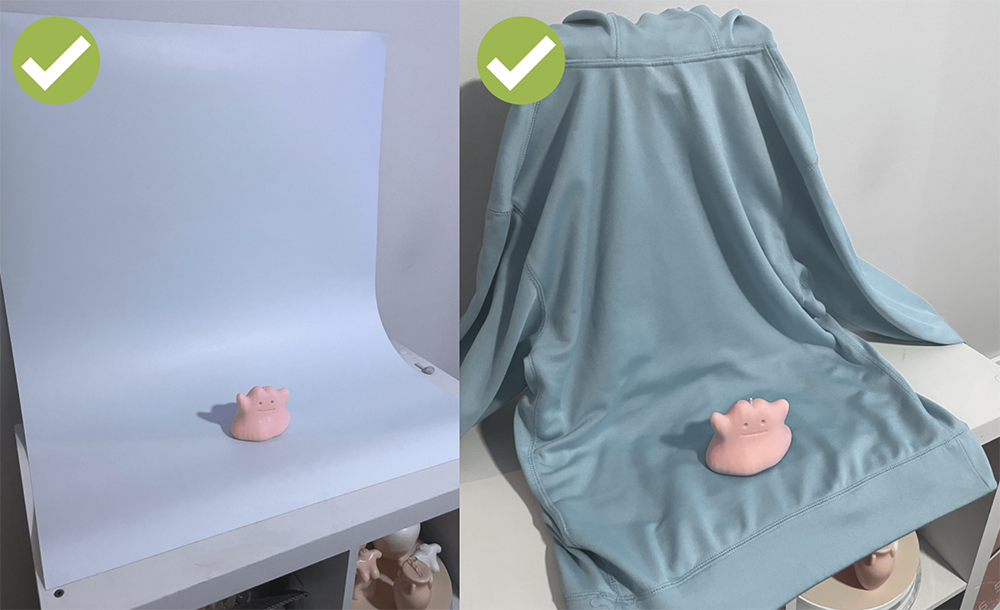
Side note: You don’t need anything fancy either... For this demo I used my vinyl backdrop that I purchased from The Backdrop Collective, however, using a piece of clothing or a sheet can be just as effective.
2. Make sure that the colour of your background is different from your subject.
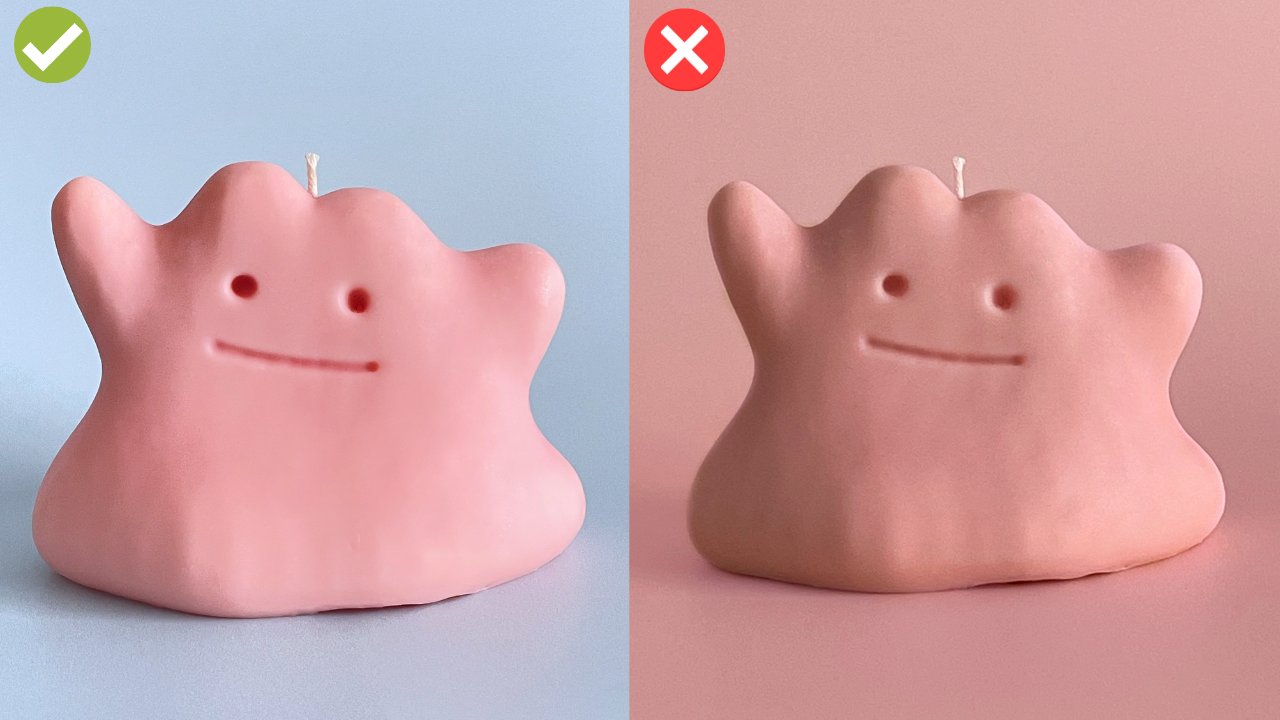
Just like with lines and patterns, if your subject and background are too similar in colour, it's likely that Photoshop will have a hard time differentiating the two when it comes time seperate them.
3. Your lighting needs to be even and clear.
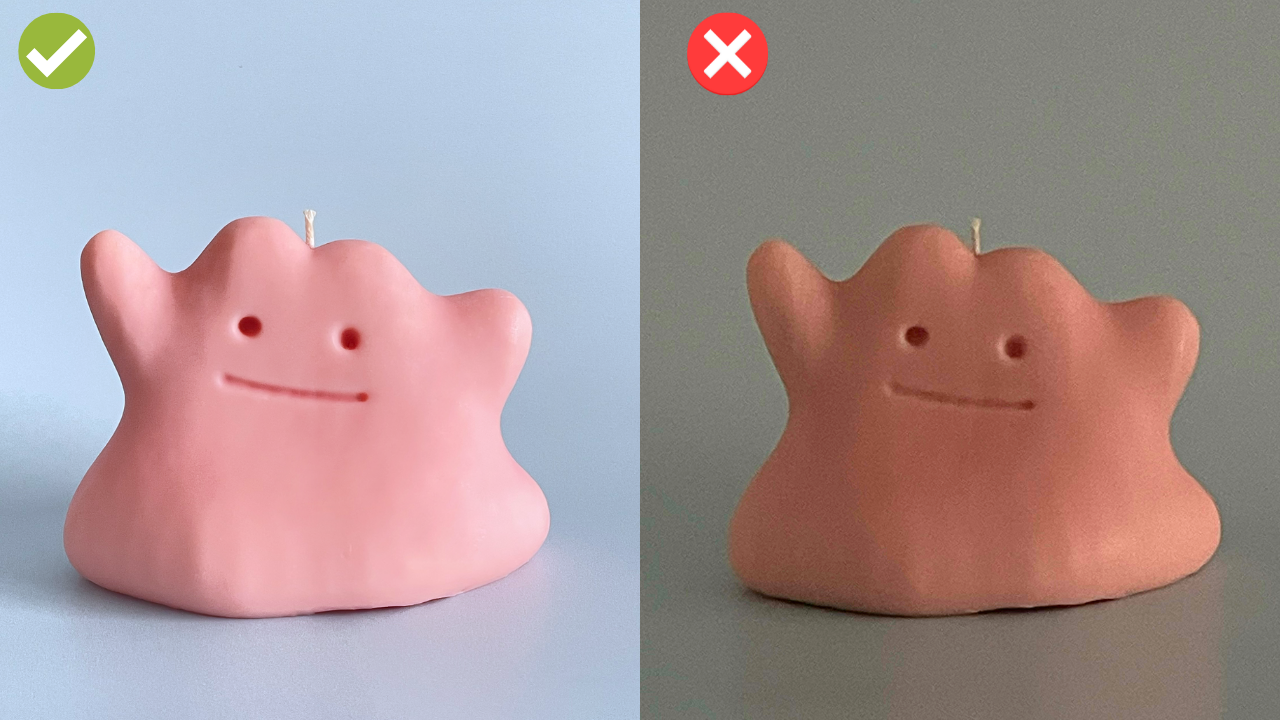
You don’t need a fancy set up to achieve this either. My demonstration image was taken with natural afternoon sunlight.
The most important thing is that the subject is well exposed, easy to see and that the image quality isn’t too pixelated.
If you can manage those 2 things, you’re set!
4. You may also want to get a few images from different angles.
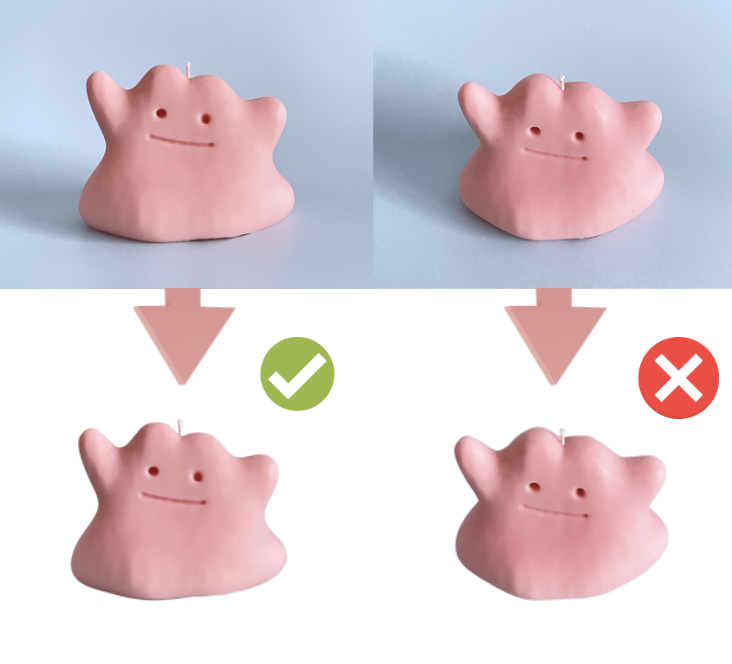
Sometimes if your angles are too high or too low it can distort the subject a bit which becomes REALLY noticeable when you remove the background.
Once you’ve got your images ready to go, it’s now time to select and refine our subject to remove it from our background.
Tools to Make Transparent Background on Photoshop
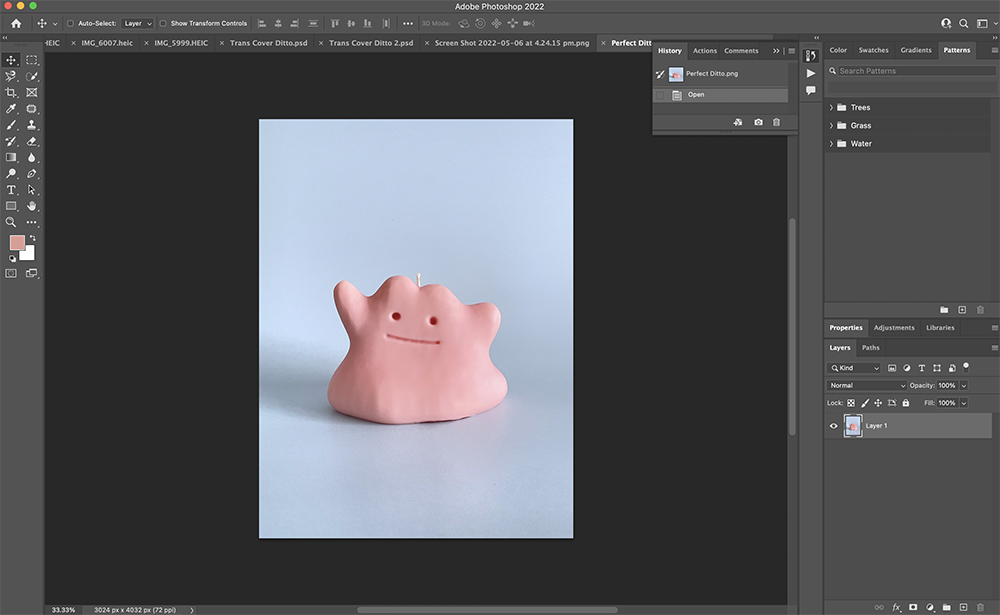
Now that we have the perfect image to create a transparent background, we can now open Photoshop.
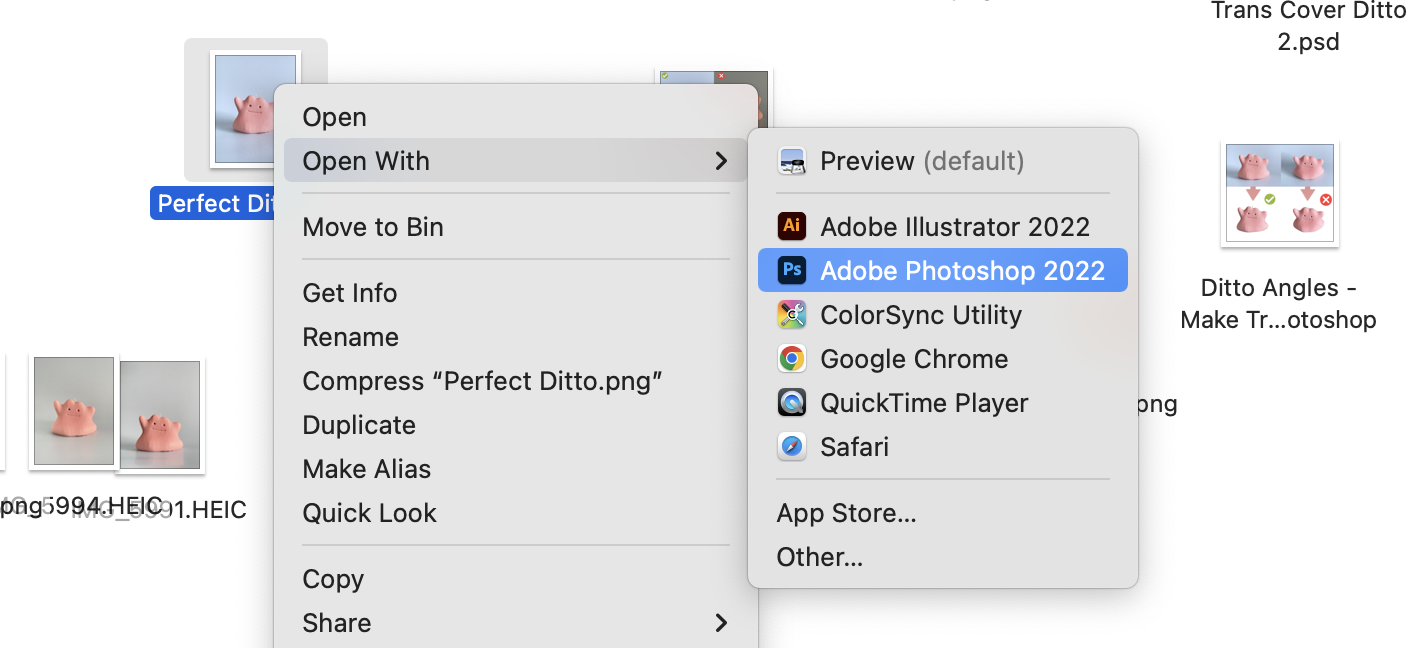
I’m on a mac so to do that I’m going to:
- Right click
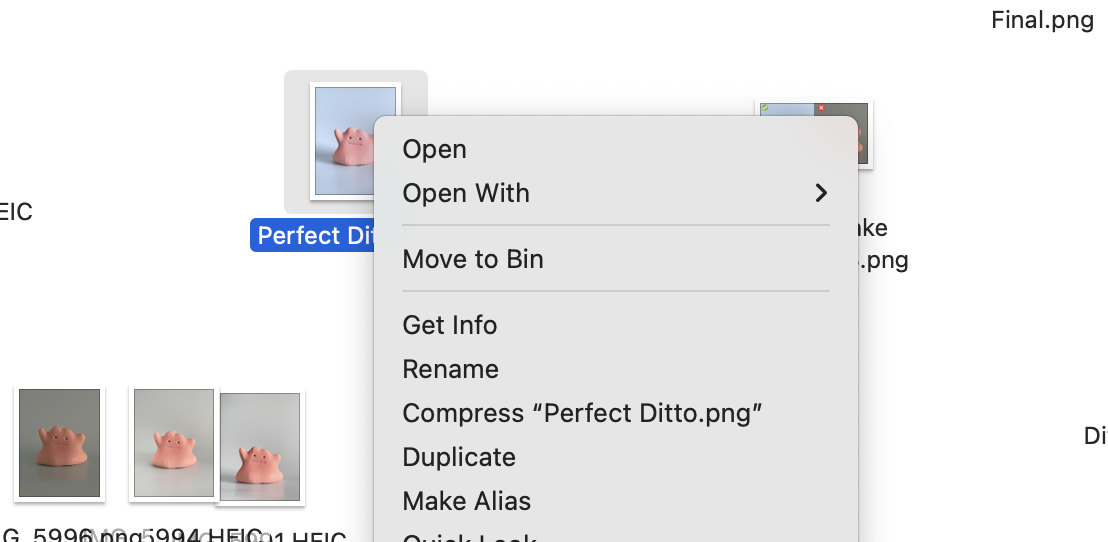
- Select “open with”
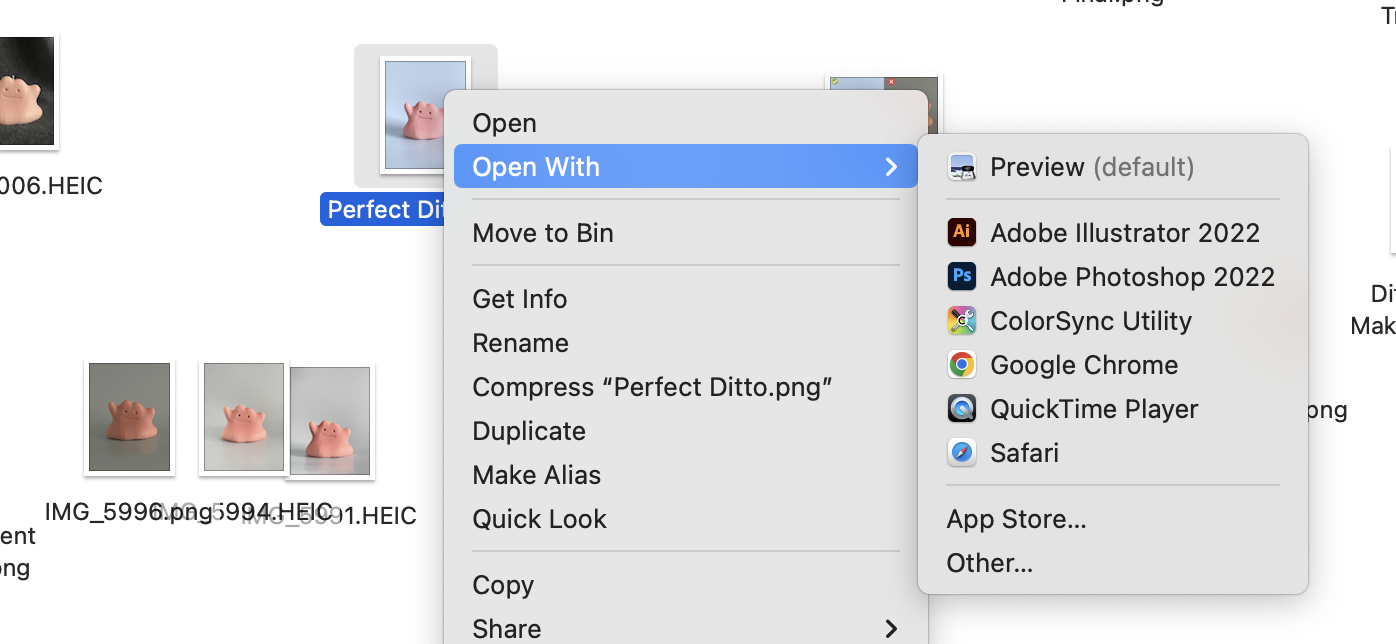
- And select Adobe Photoshop
If you’re brand spanking new to Photoshop, all the panels and buttons might look a bit crazy and overwhelming, and that’s ok because out of all the tools Photoshop has to offer we’re only going to be using 3 - 4 of them.
Next, we need to make sure our properties panel is visible.
If you can’t immediately see the properties menu available on the right hand menu, all you need to do is click:
- "Window"
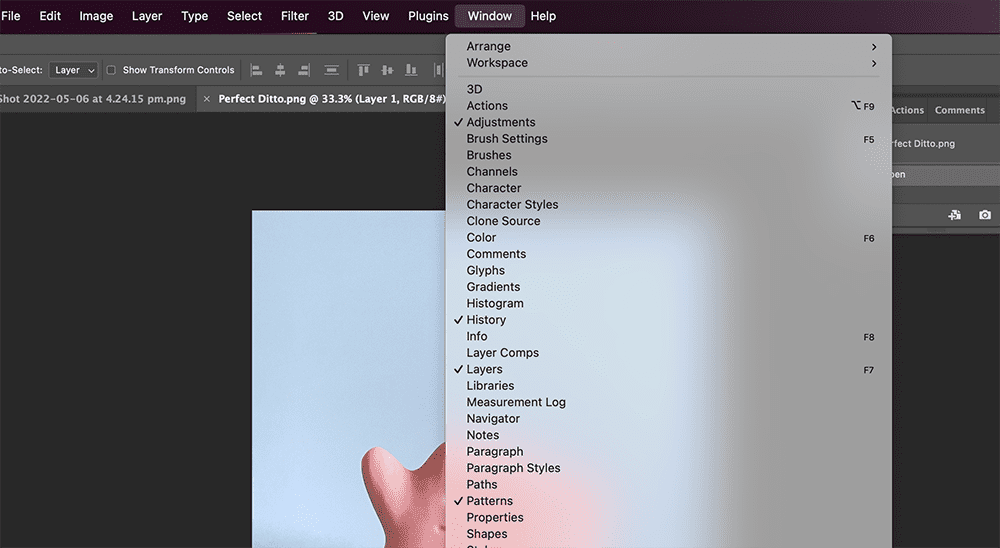
- Select "properties"
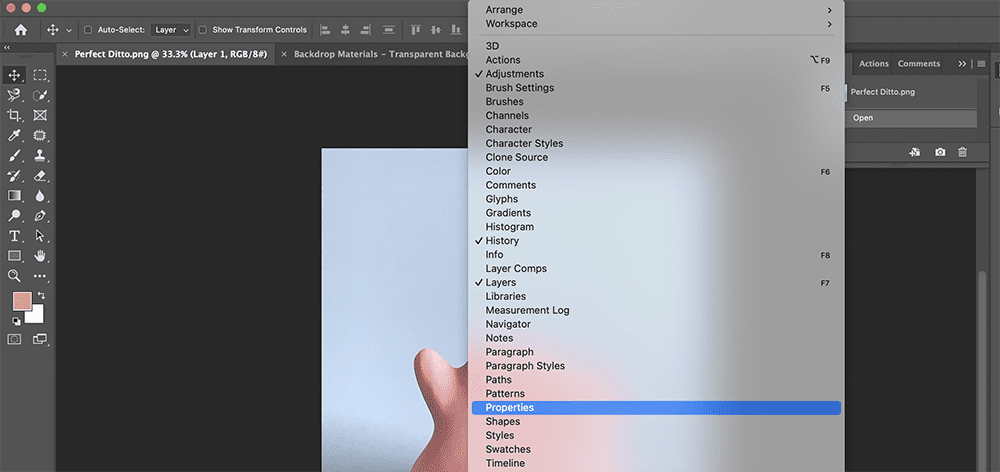
Once you've clicked "properties" you should see a menu like this:

Now we have our properties panel open, navigate to the “Quick Actions” section and click “Remove Background”
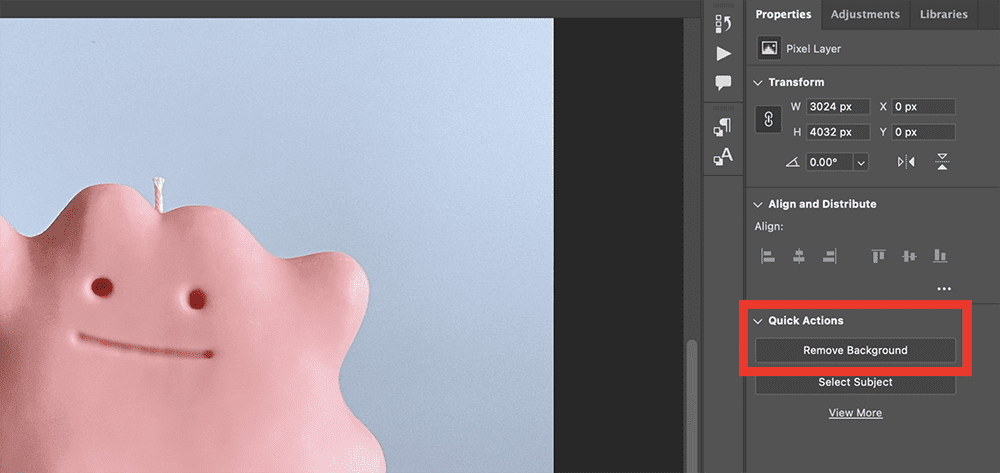
Instantly after clicking the “remove background” button, Photoshop will automatically create a layer mask around your subject and remove what it thinks is the background.
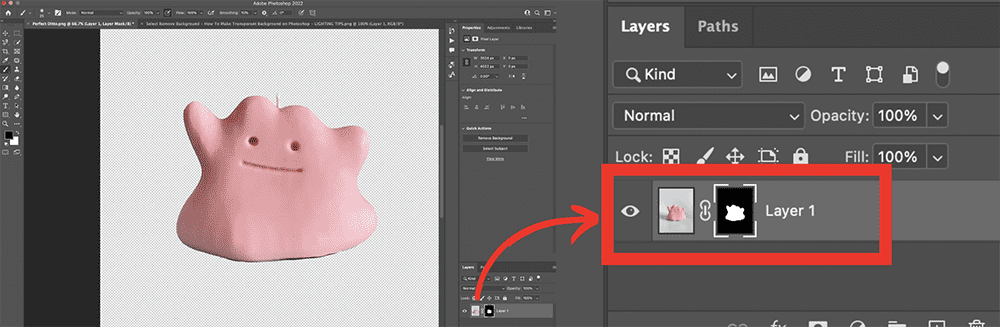
If you’re unfamiliar with what a layer mask is, it’s pretty much a sublayer that sits on top of your main image and it allows you to add and subtract parts of your image at any given time using the brush tool.
And as you can see by the auto generated result, Photoshop didn’t do a bad job at all for a click of a button right?
HOWEVER!
If you look closely, you can see the cut out is a little jagged and harsh around the bottom where the natural shadow from the light is occurring.
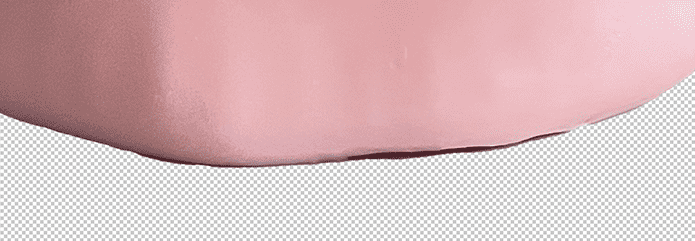
You could prevent this from happening if you were to toy around with your lighting a bit more when taking your images but it’s actually very easy to fix right here in Photoshop by slightly adjusting our layer mask.
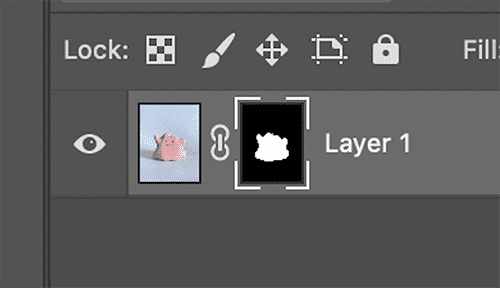
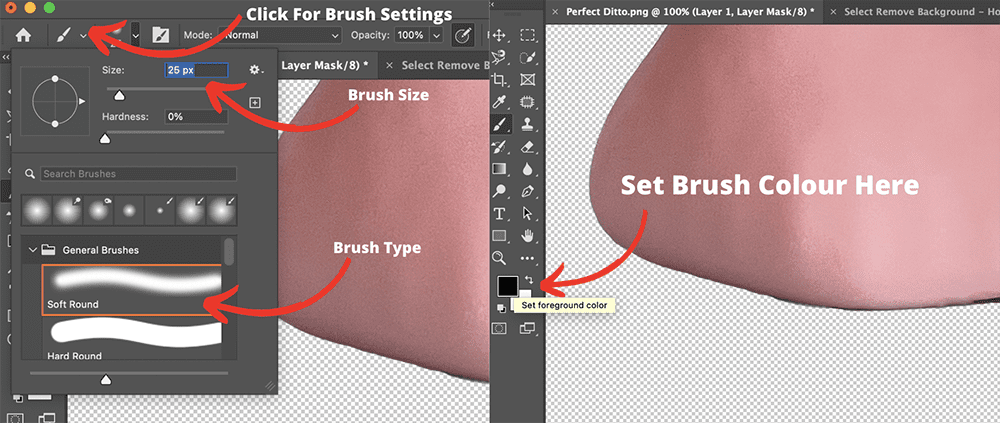
When it comes to adjusting our layer mask we need to use the brush tool.
When the brush tool’s foreground colour is set to black, you can hide more of the image and if you wish to bring some of the image back, you just need to switch the foreground colour to white.
In this case, we want to remove more of our image so we’re going to set our brush to soft round, set our foreground colour to black and set our brush size to about 25px. (you may need to go smaller depending on the intricacy of your subject)
NOTE: Before you start refining your edges with your brush, make sure your layer mask is actually selected otherwise you'll end up painting black onto the main image.
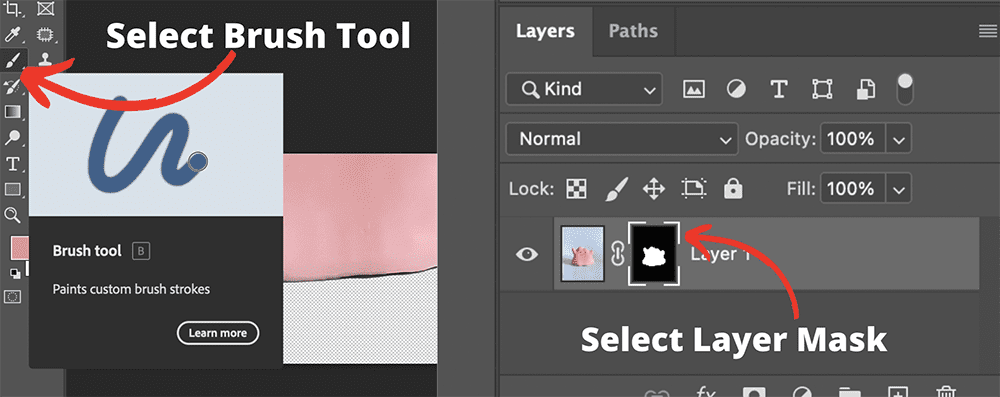
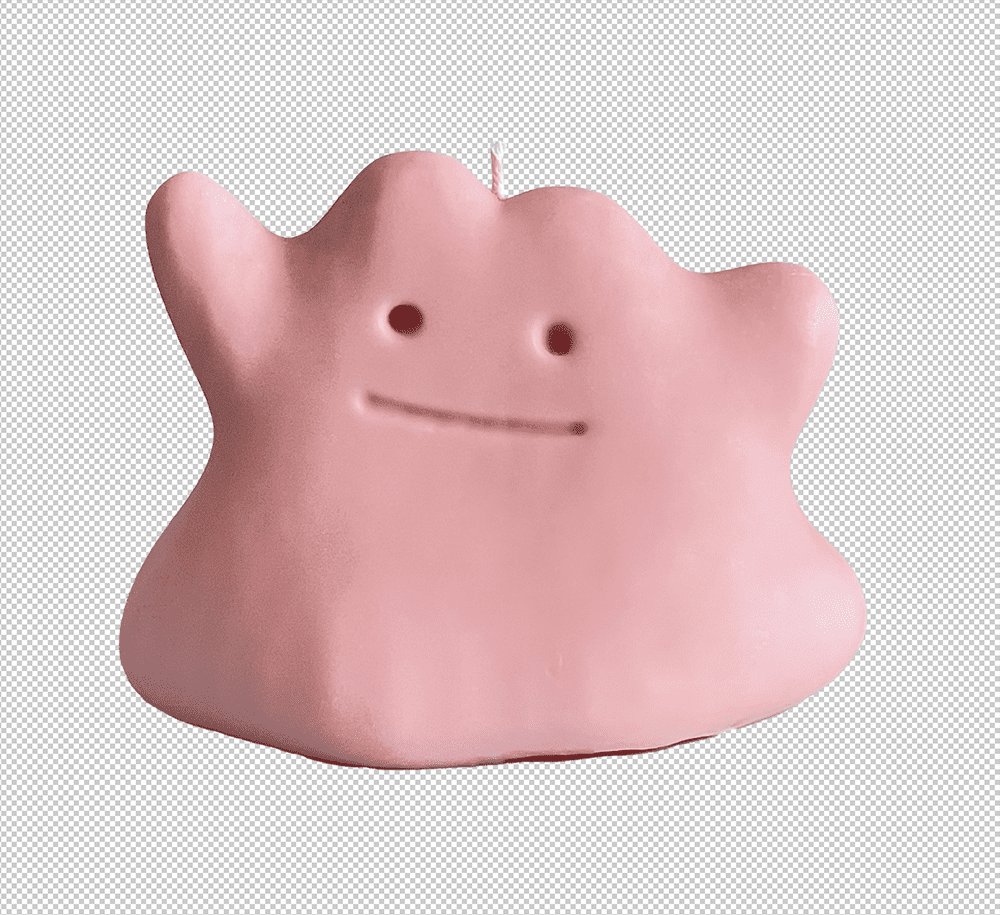
Now with our layer mask selected and our brush set, all we need to do is go in and gently soften any of those harsh edges that we can see until we're happy with our result.
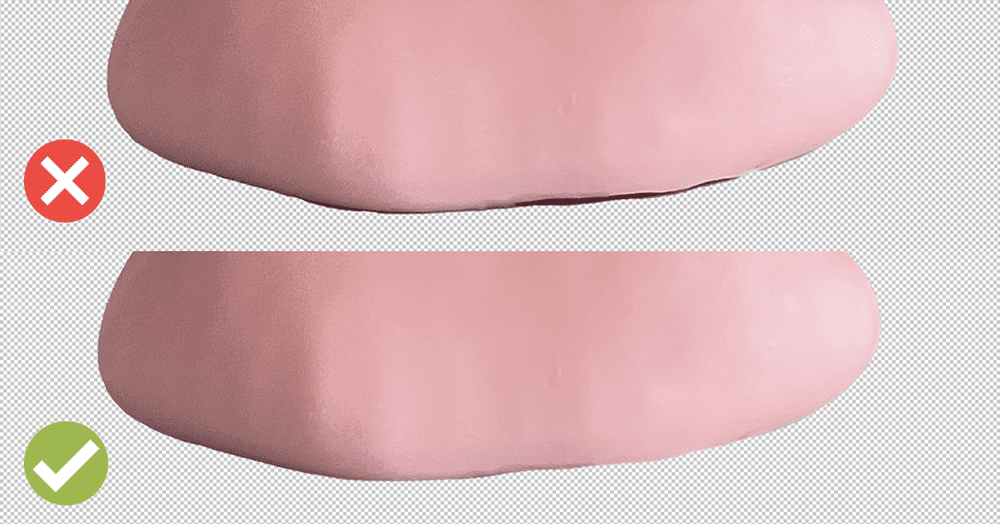
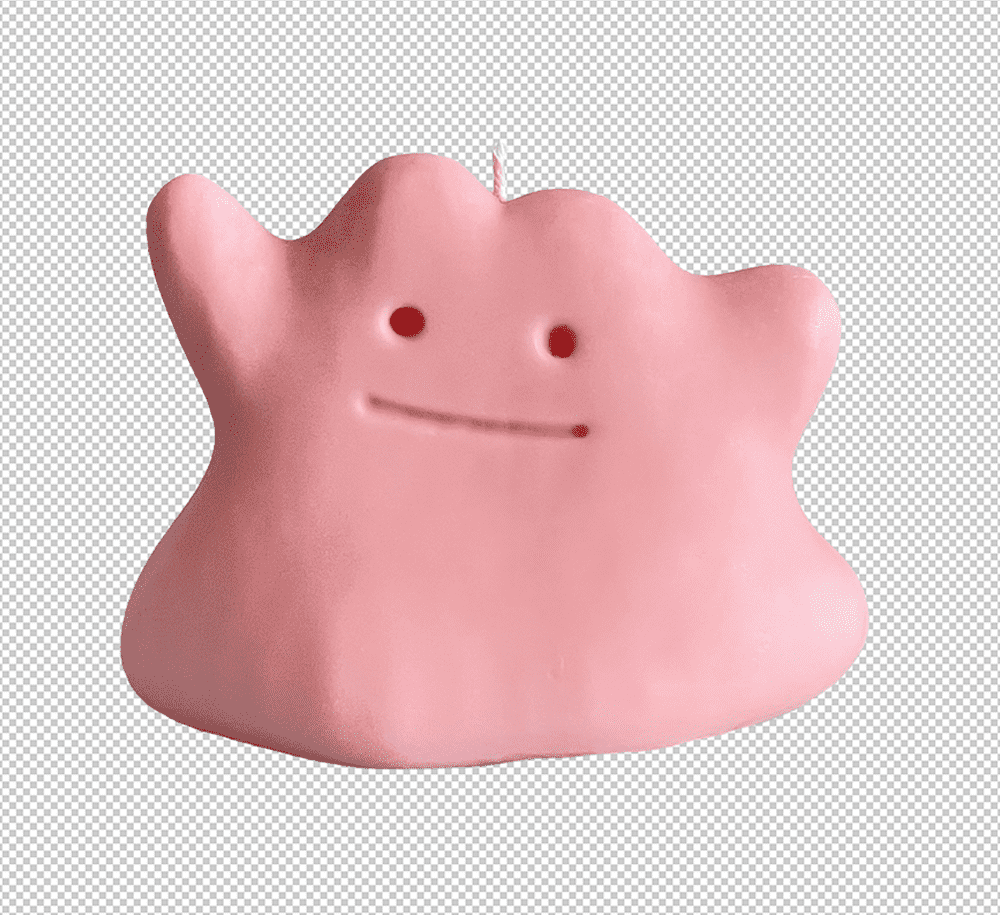
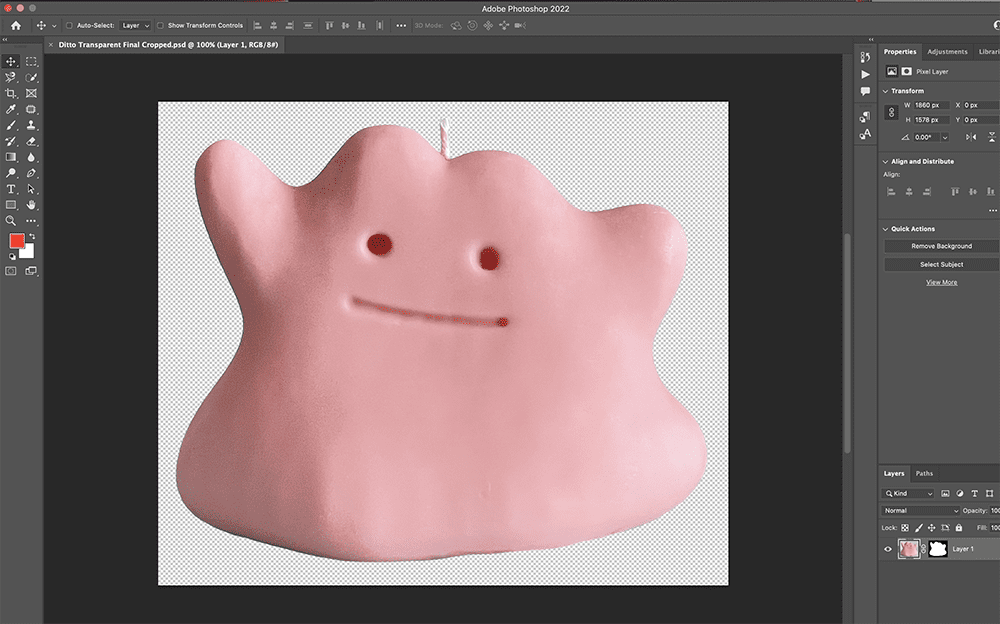
After a bit of tweaking, your background should be completely removed and your subject should be looking smooth and well cut out.
How To Export An Image With a Transparent Background on Photoshop
Now we've successfully removed our background, we need to export our image as a .psd file and .png file.
About .psd Files
.psd files are Photoshop's native file type.
Saving our image as a .psd file will allow us to preserve all of the photoshop data we used to generate this image.
e.g Our original photograph + our layer mask that we used to remove the background.
This means in future if we ever decide that we want to refine or adjust our layer mask, we can easily do so by opening our .psd file in Photoshop and making the changes we want before re-exporting a new .png file.
How To Save a .psd File
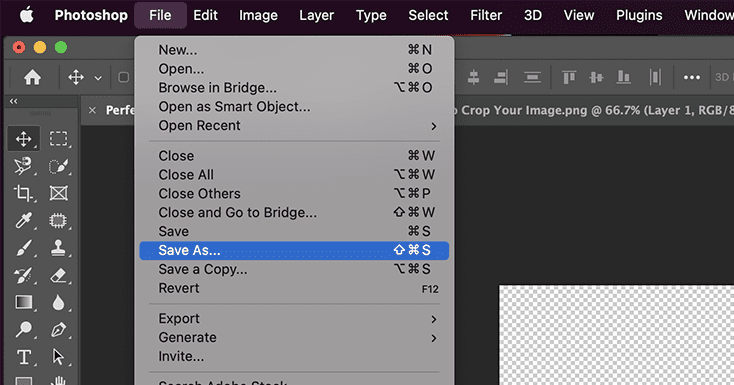
To save your image as a .psd select "File" then "Save As"
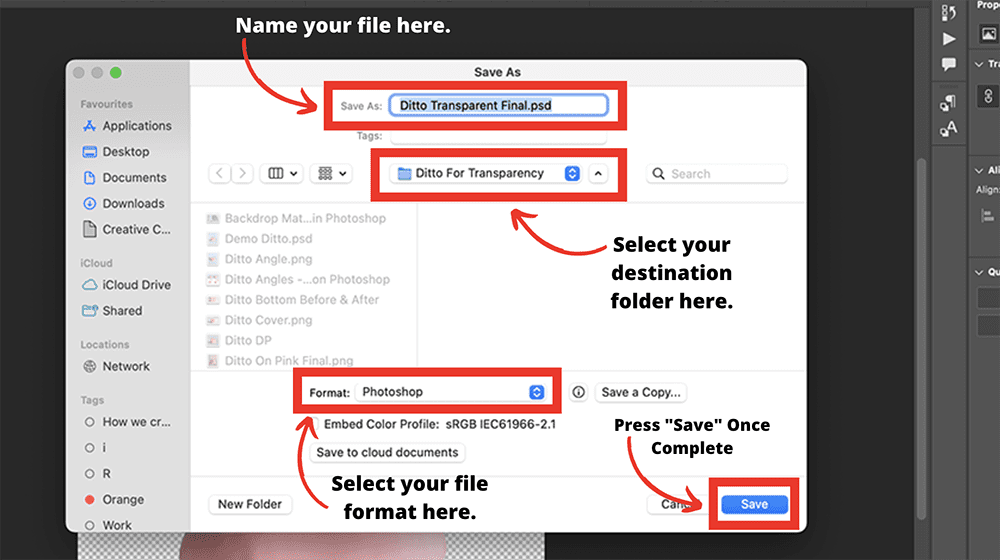
Next, you'll be presented with the Save Screen. On this screen you'll want to ensure you've done the following:
- Named your file appropriately.
- Ensure "photoshop" is selected as the format setting.
- Ensure the file's save destination is correct.
- Click "Save"
After clicking save, navigate to your destination folder and you should now be able to see your saved .psd file.
Now we've saved our .psd file, it's time to export our .png file.
About .png Files
Simply put, .png files (aka portable network graphics) are a file type that allows for transparency in the final image.
.png files are similar to .jpg files except .png files are rendered using lossless compression which allows for transparency in the image.
Preparing Your Image For .png Export
Before we get into of exporting our .png, you'll probably notice that we have a great deal of unnecessary blank space around our subject now...
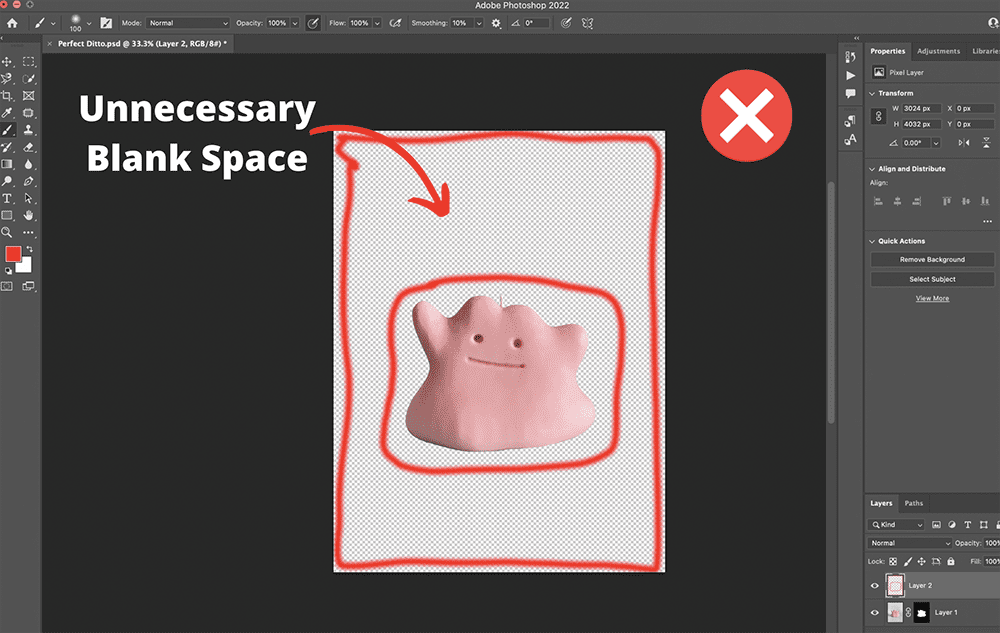
If this space isn't removed before exporting our final .png file, the blank space will be written into our final image and make the final bigger than it actually needs to be.
To fix this we're going to need to crop our image as close as possible to our subject to reduce the amount of surrounding blank space.
However, if we crop the .psd file that we just saved, we'll lose the original preserved Photoshop data that allows us to access the original version and size of our image.
So to get around this issue, we're going to duplicate our original .psd file in our destination folder and update the name to contain the word cropped.

By doing this, we are able to keep a .psd file that contains our image's original size as well as one that contains the cropped size.
In the tech world, it's always best to keep a backup of your originals because sometimes you can make some hectic mistakes that are irreversible and if you don't have back up files of your original, sometimes you have to start from scratch which let's be real... No one likes wasting their own time.
So just duplicate the file. 😂
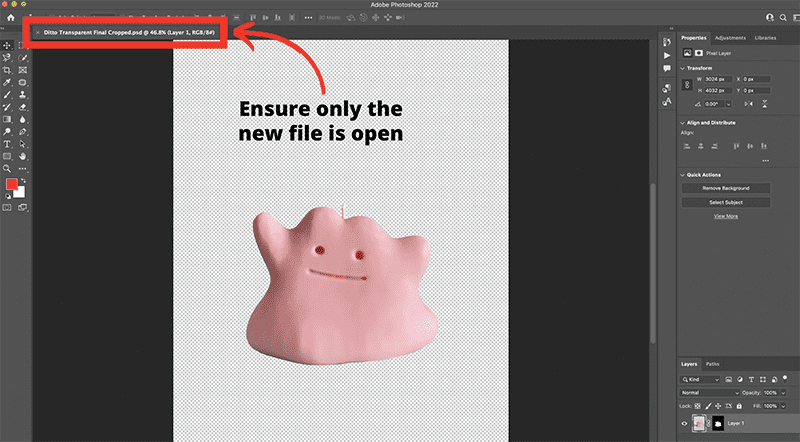
Once you've duplicated the file, open it in Photoshop and close the original to avoid editing the wrong image.
Next, we'll want to navigate to our "Crop Tool" and move the crop edges as close to our subject as possible.
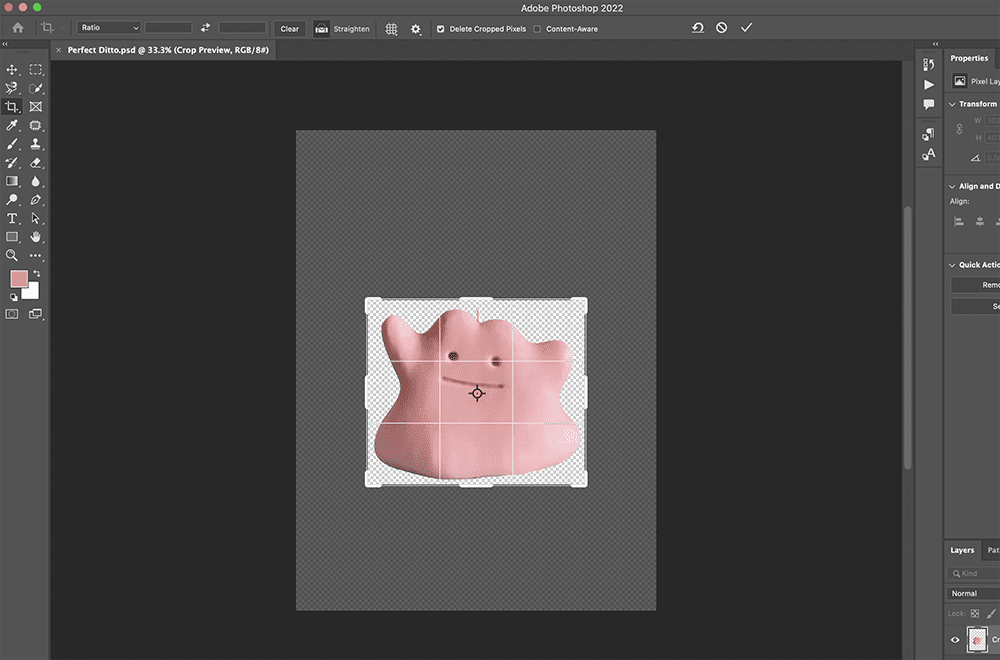
Once you've tightened your crop margins, hit "enter" and then "command+s".
This will apply your crop and save a new .psd file of your cropped subject.
How To Export a .png File
Now that we've created and saved our cropped .psd file, we're finally ready to export our final subject as a .png file with a transparent background.
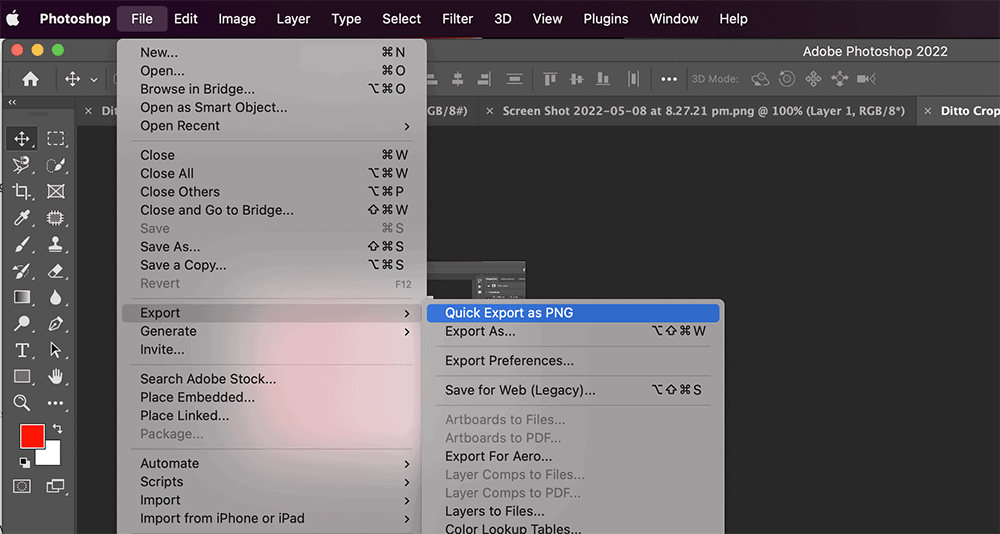
To export your images as a .png file, select "File", "Export" and then "Quick Export as PNG"
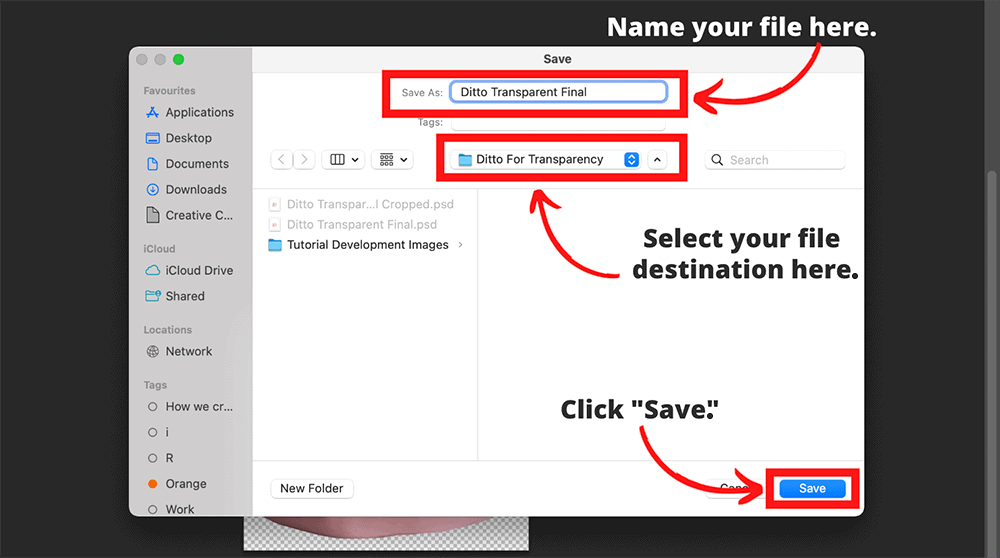
Just like saving our .psd file, the save screen will pop up and you'll want to ensure you've done the following:
- Named your file appropriately.
- Ensure the file's export destination is correct.
- Click "Save"
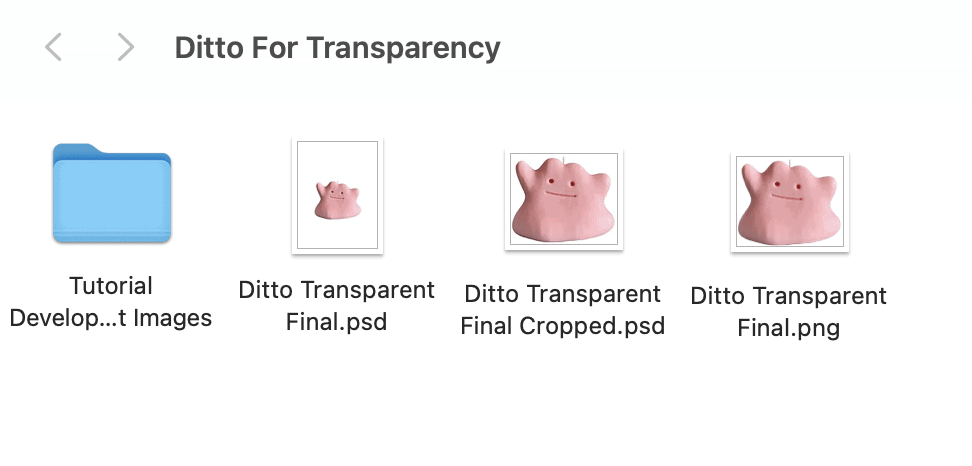
And again, just like saving our .psd file, your final .png image with a full transparent background should be visible in your destination folder!
Congratulations! You've learnt how to make transparent background on Photoshop! 🎉
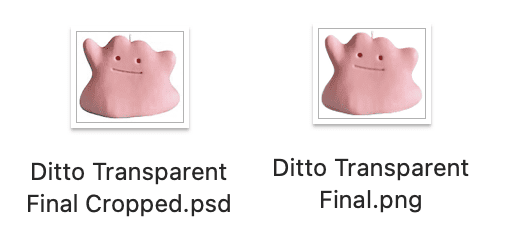
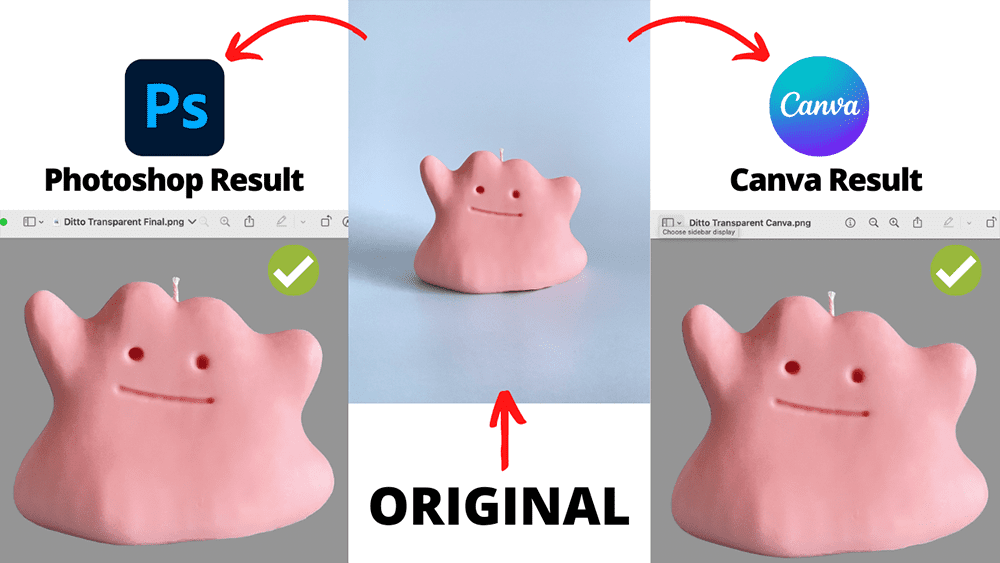
If you're like me and want to compare your original image with your final just to see how you did, I always open both of them and have a look just for good measure.
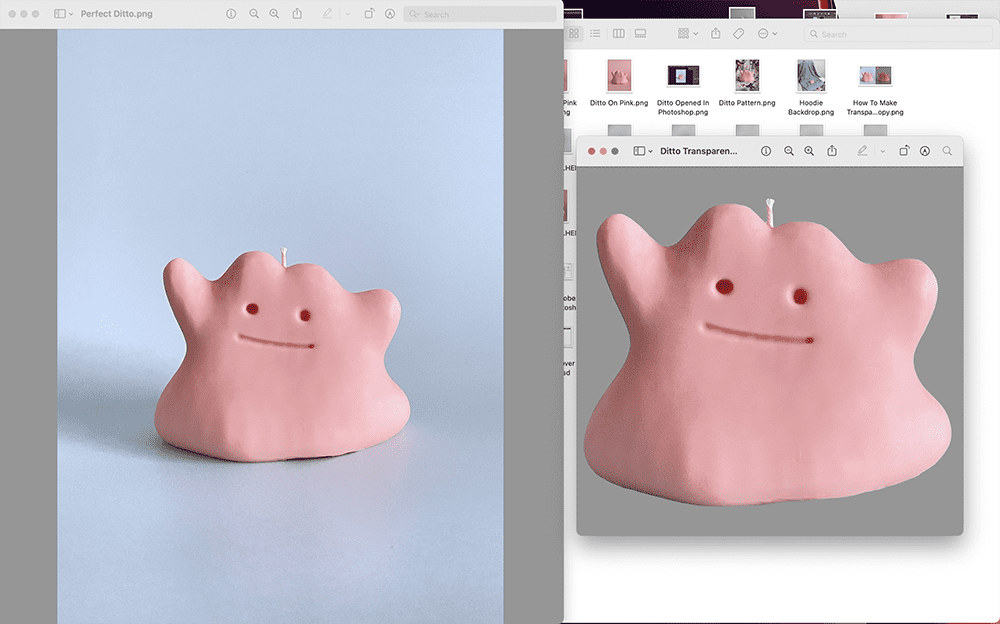
Other Methods To Remove The Background of An Image.
At the beginning of this blog post I mentioned that I'd also introduce you to another really effective software on the market that can also help you with making your background transparent.
In some cases, it's even easier!
The software I'm referring to is Canva.
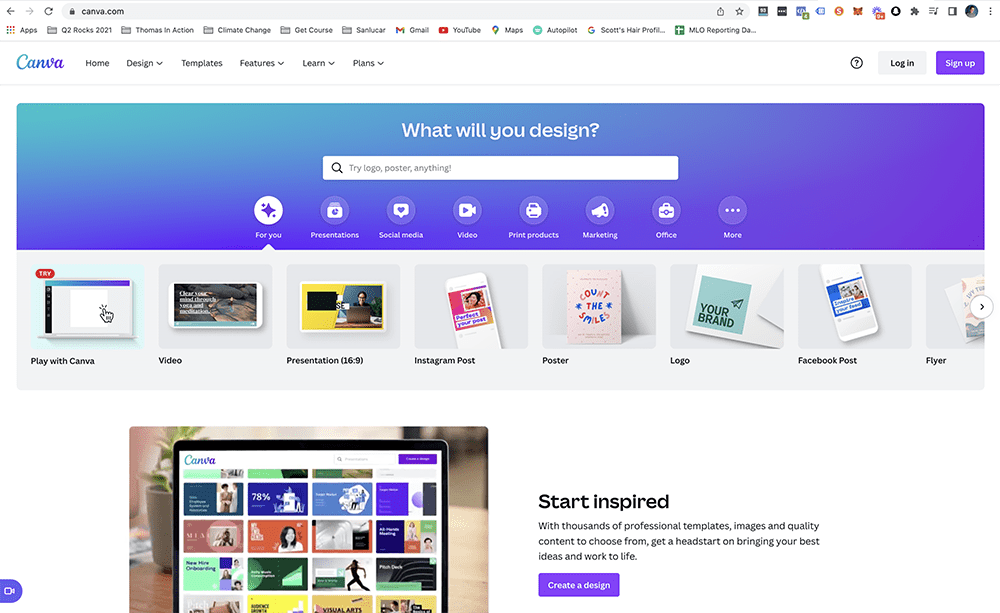
In short, Canva is an all in one graphic design tool perfect for all kinds of businesses from sole traders, to small business owners right up to large enterprises.
The reason Canva is such a great tool is because it enables just about anyone with basic computer skills to achieve decent graphic design outcomes without needing to be or hire an actual graphic designer.
Canva does have it's limits though and it won't give you the same unique artistic results that you would expect from a real graphic designer.
However, the templates and tools that it does provide can certainly help you quickly create professional looking graphics that do the job.
Including removing the background of your images!
Canva does offer a free account plan however, in order to use their Background Remover tool, you will need to have a pro account.
At the time of writing this post, Canva Pro Accounts will cost you $17.99 per month.
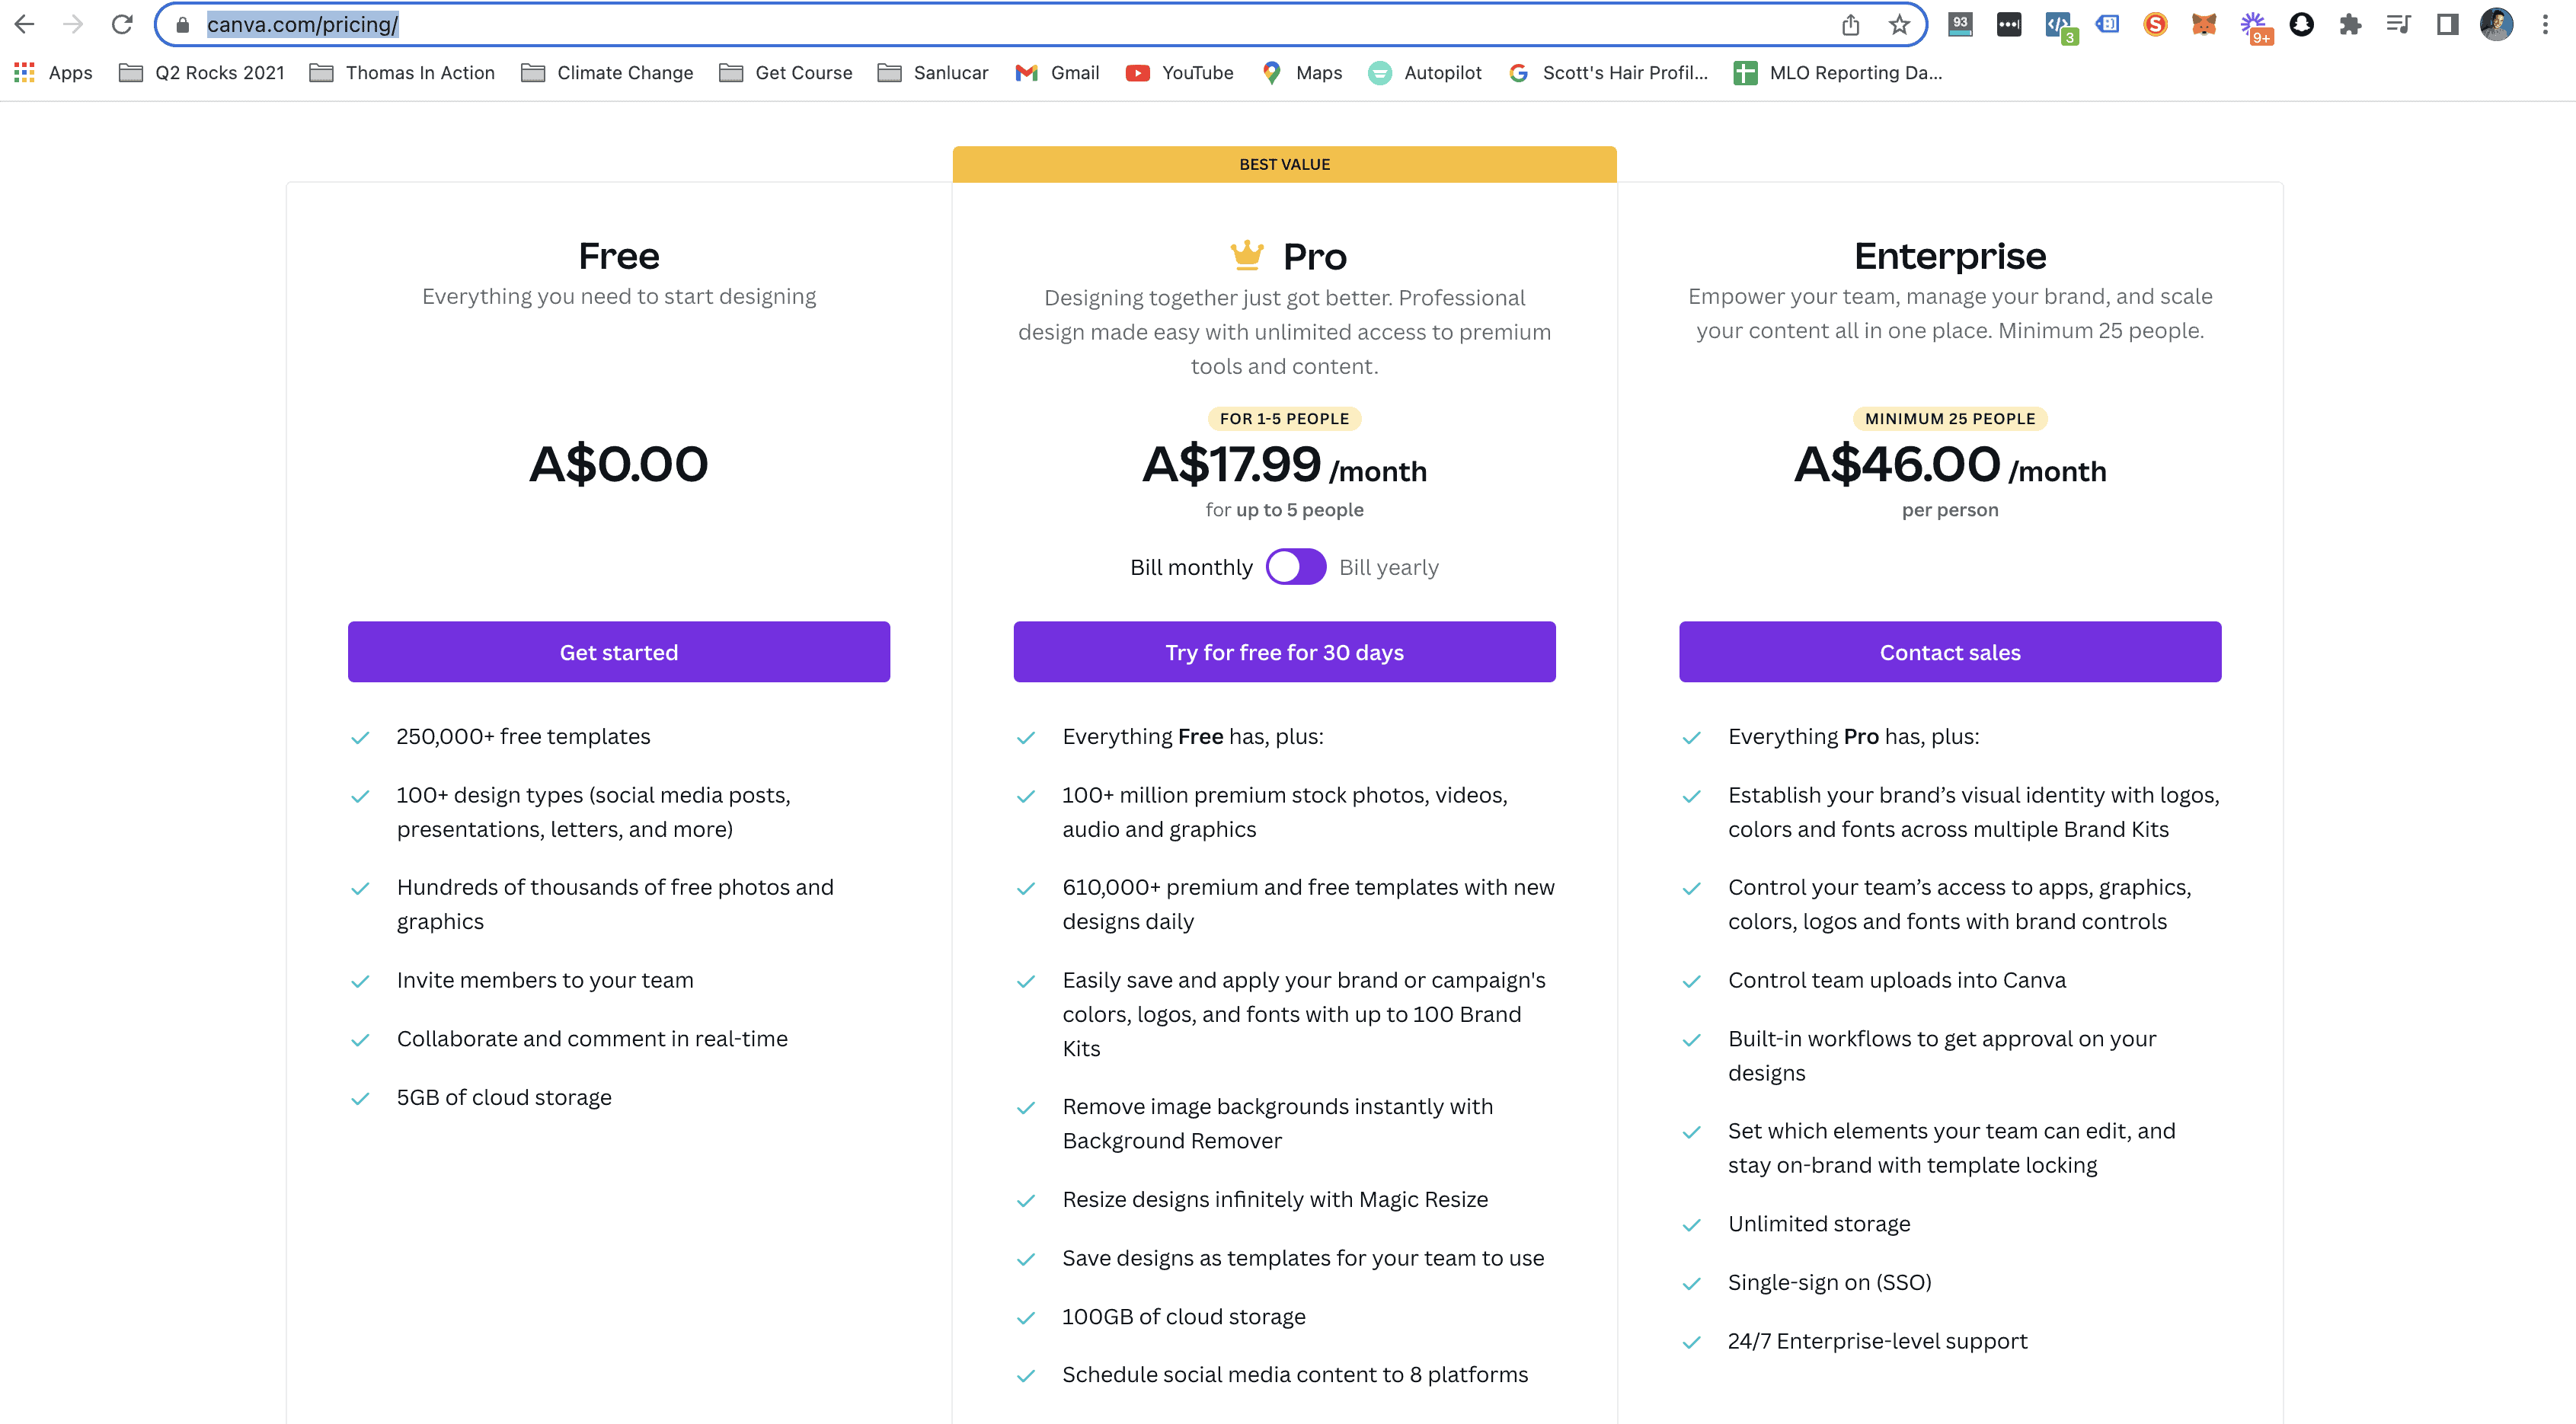 Sign Up For Canva Pro Here
The cost of a Canva Pro Account is slightly more expensive than Adobe's Photography Bundle so when it comes to choosing one of these softwares to work with it will really depend on your current needs aside from removing backgrounds...
Anyway, if you're keen to background removal a go in Canva, head to canva.com and create your pro account before continuing to the next step.
How To Remove Background On Canva
Document Set Up On Canva
Once you're inside the Canva interface, the first thing you'll want to do is set up a document in the correct size.
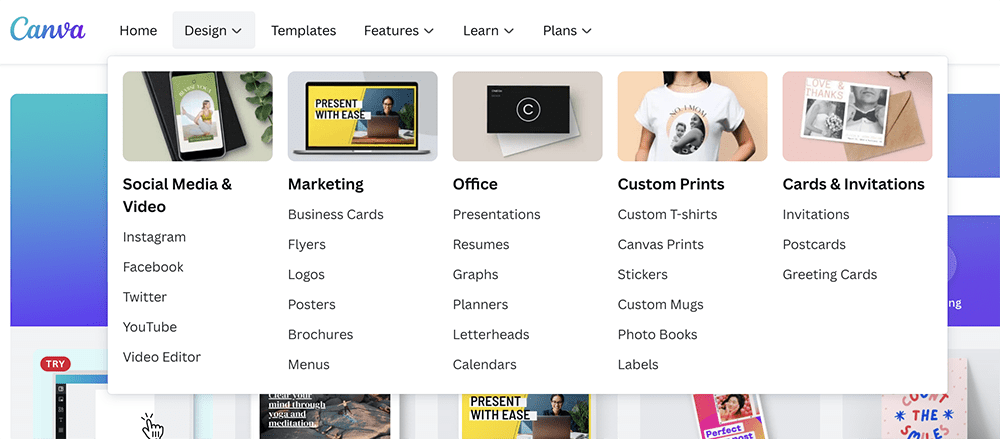
Because we are working with one of our own images and not a template, we're going to need to create a custom design.
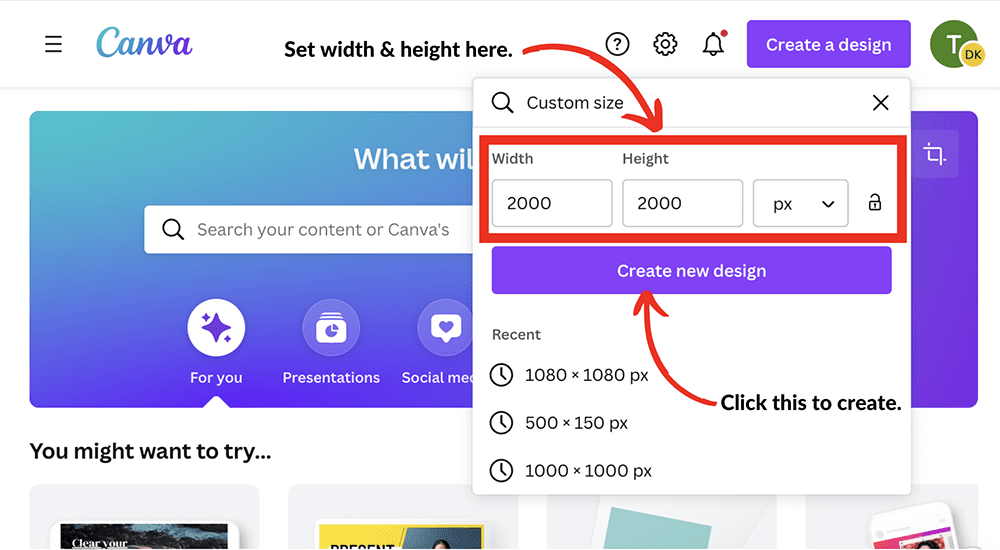
To do this, you need to click "Create a Design" and then "Custom Design"

Next, you'll be prompted to set the dimensions for your new design.
Because we know our subject will fit into a square canvas, we're going to make our new design a square shape by setting our width and height to 2000 pixels each.
NOTE: 2000px by 2000px is actually quite large for the type of file we are producing here but the reason I'm starting with such large dimensions is because I want the software to have the best chance of cutting my subject out smoothly.
If we work with a canvas that is too small, our image will be more pixelated when we load it into Canva which may result is a rather average looking cut out in the end.
So once you've set you dimensions click "Create new design".
Now that we've got our document setup complete, it's time to import our image.
To do this, all we need to do is locate our image on our drive or computer, then drag & drop it into our Canva document.
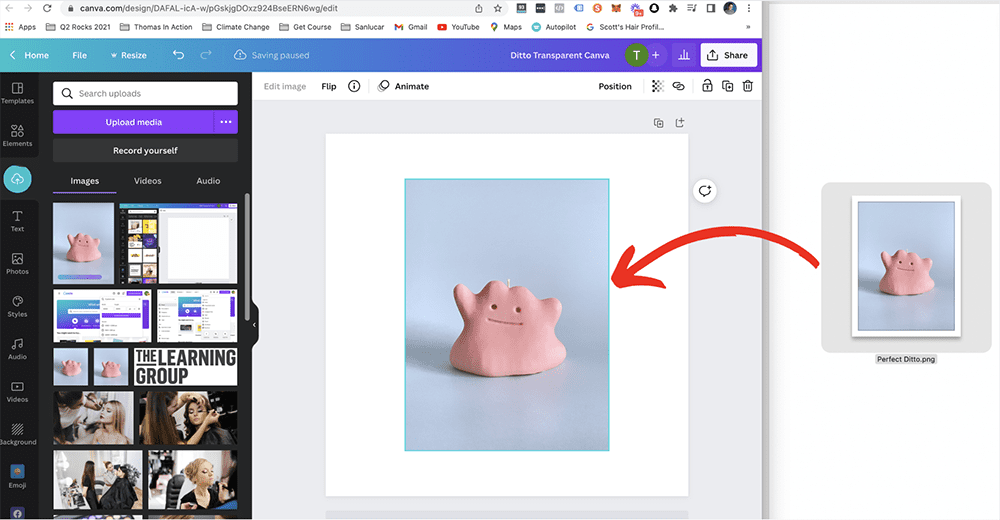
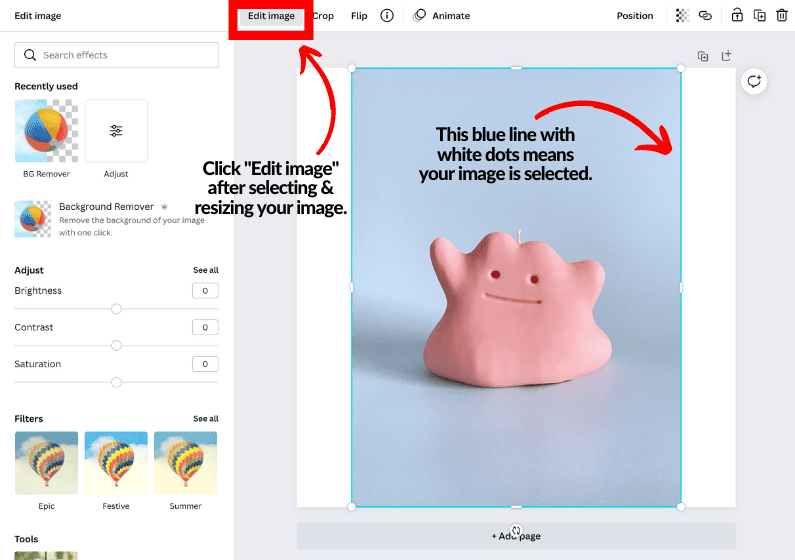
Once our image has loaded into Canva, all we need to do is make sure our image is selected and then click "Edit image" and the image editor panel should instantly pop up on the left hand side.
Inside the "Edit image" panel you'll see a beach ball icon with a half transparent background.
This is the Background Remover tool!
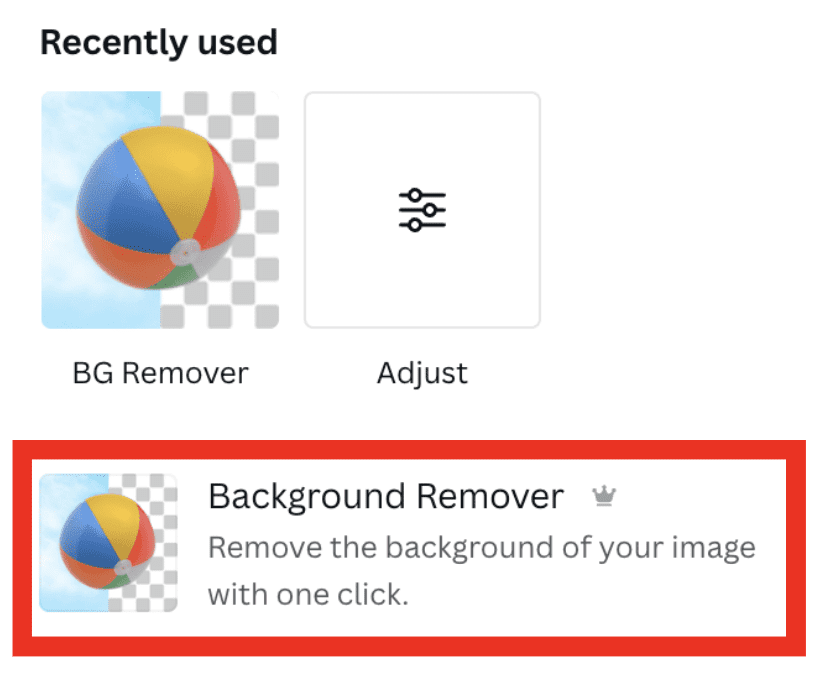
Once you've located it, give it a click and watch the magic happen!
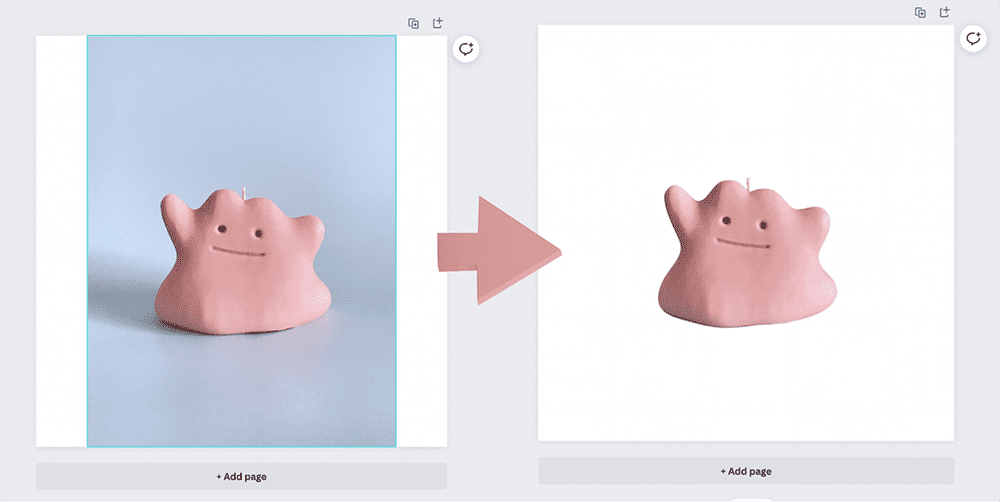
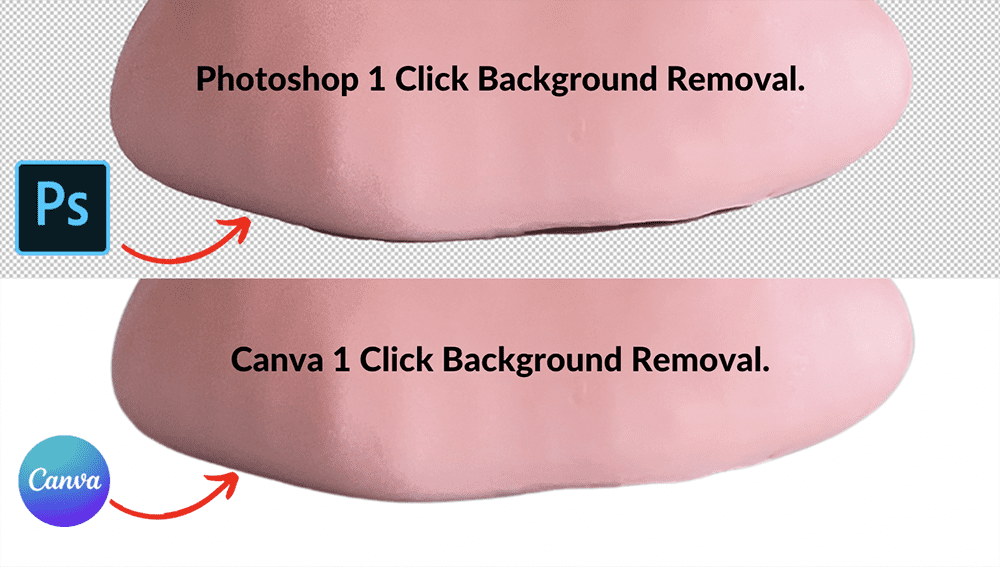
As you can see from the image above, the Background Remover tool has done a pretty good job of removing our background.
Upon closer inspection, Canva has actually done an even better job with 1 click than Photoshop did!
Judging by these results, no further refining is really needed however, if for some reason Canva produces a jagged edge on your subject, there is an "Erase & Restore" tool that becomes available right after you remove the background.
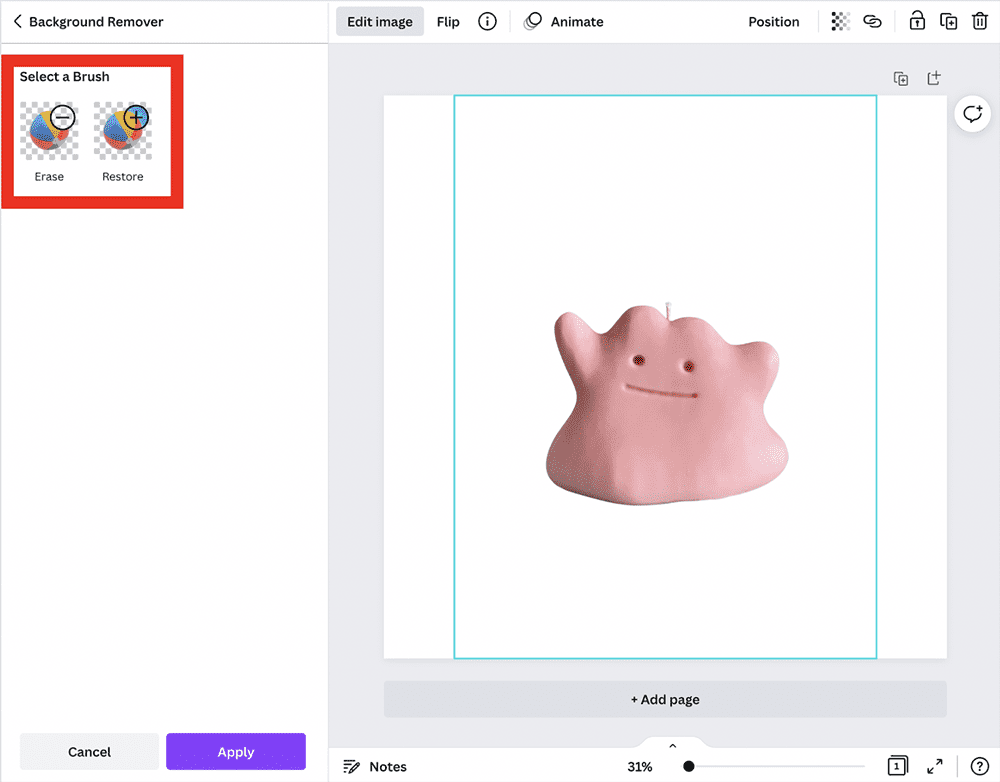
These tools work very similarly to the layer mask and paint brush method that we used in the Photoshop component of this tutorial.
The only downside with this tool is the brush options are very basic and the ability to soften the eraser edges is not possible which makes erasing jagged edges in Canva a little more tedious than in Photoshop.
How To Export a PNG With a Transparent Background with Canva
Now that we've successfully removed our background using Canva, it's nearly time to export our final .png image but first...
Just like in Photoshop, you'll see that yet again we have a heap of unnecessary blank space on our canvas.

To fix this we first need to crop the edges of our subject as close as possible.
To do this, click "Crop" and drag the edges down to fit the subject.
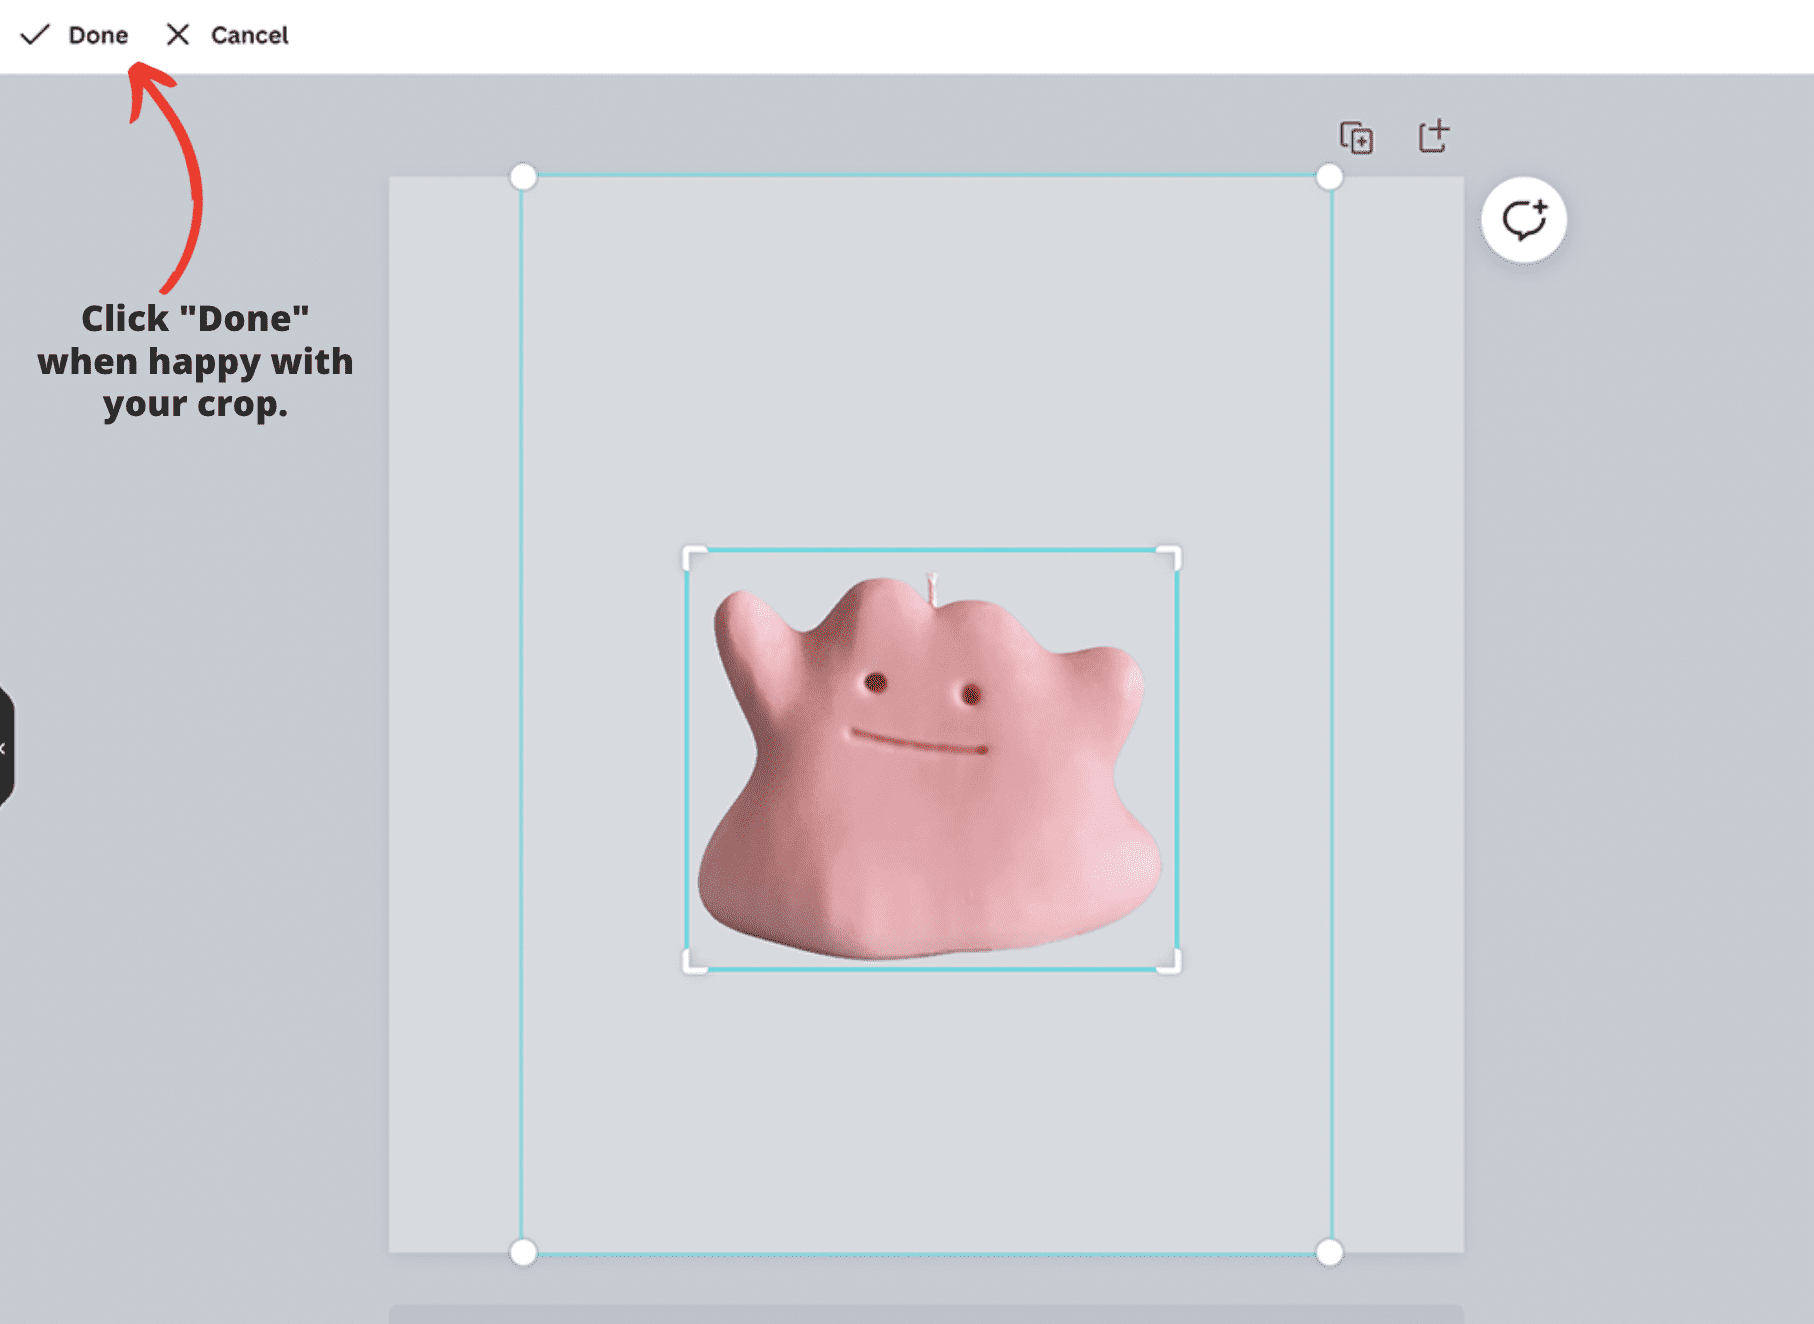
Once our subject has been cropped, we now want to expand its size to fit our canvas.
To do this, select your subject, hold "option/alt" and drag one of the white dots outwards until your subject fits into the canvas.
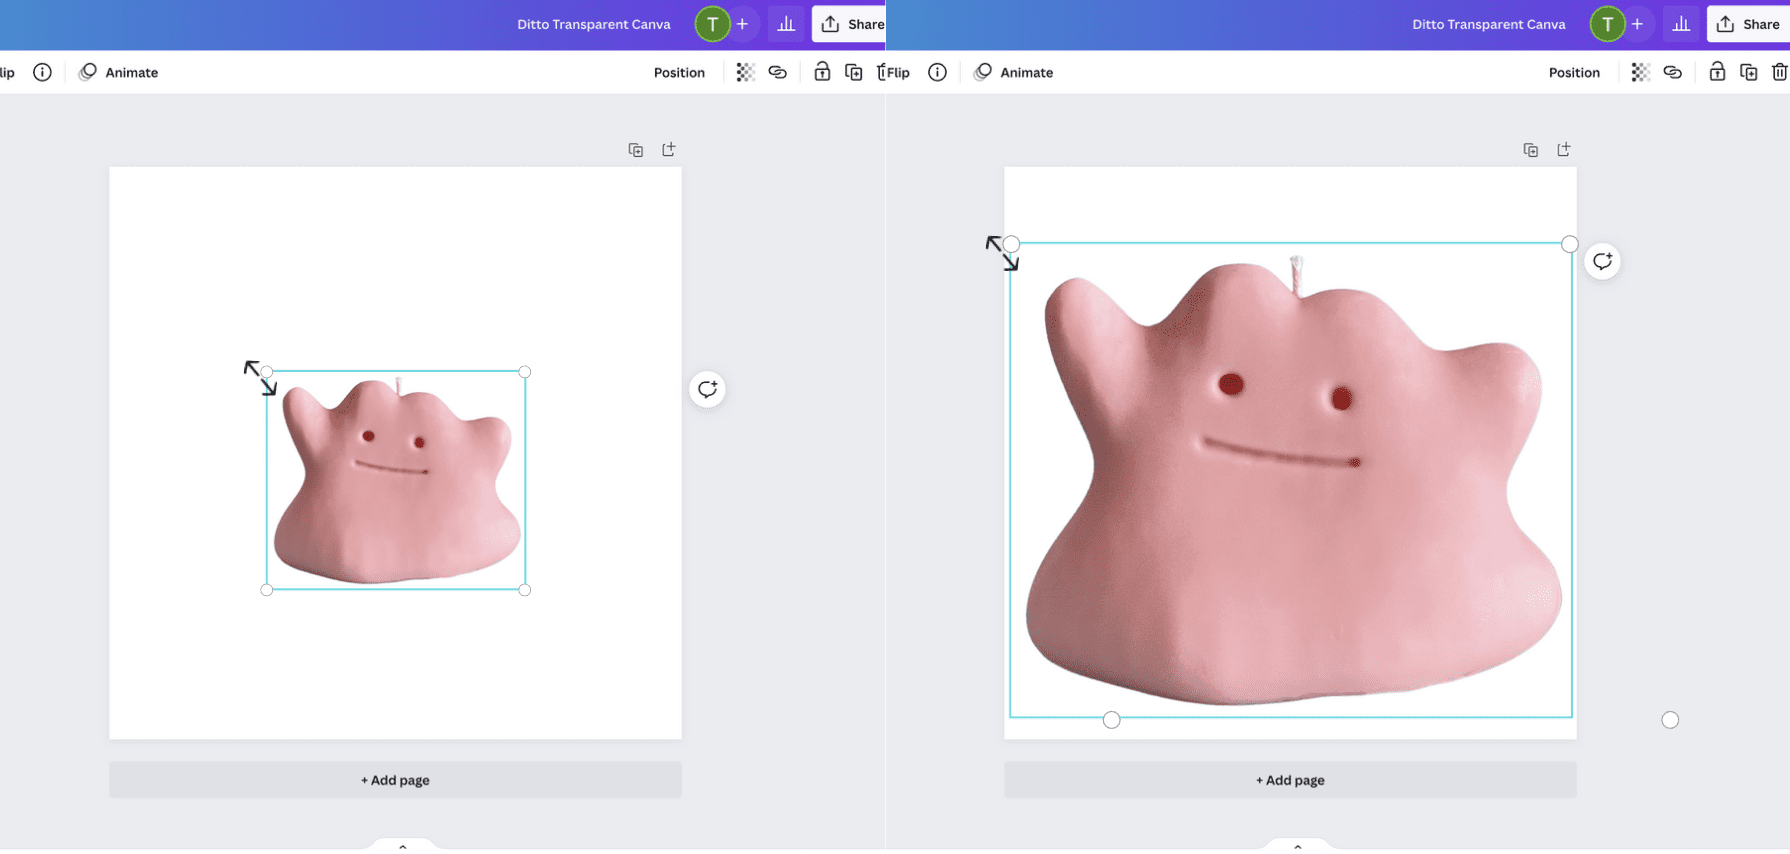
As soon as we're happy with the size of our subject in comparison to our canvas, we're now ready to export our final image from Canva.
To begin the export process, click "Share" then "Download".
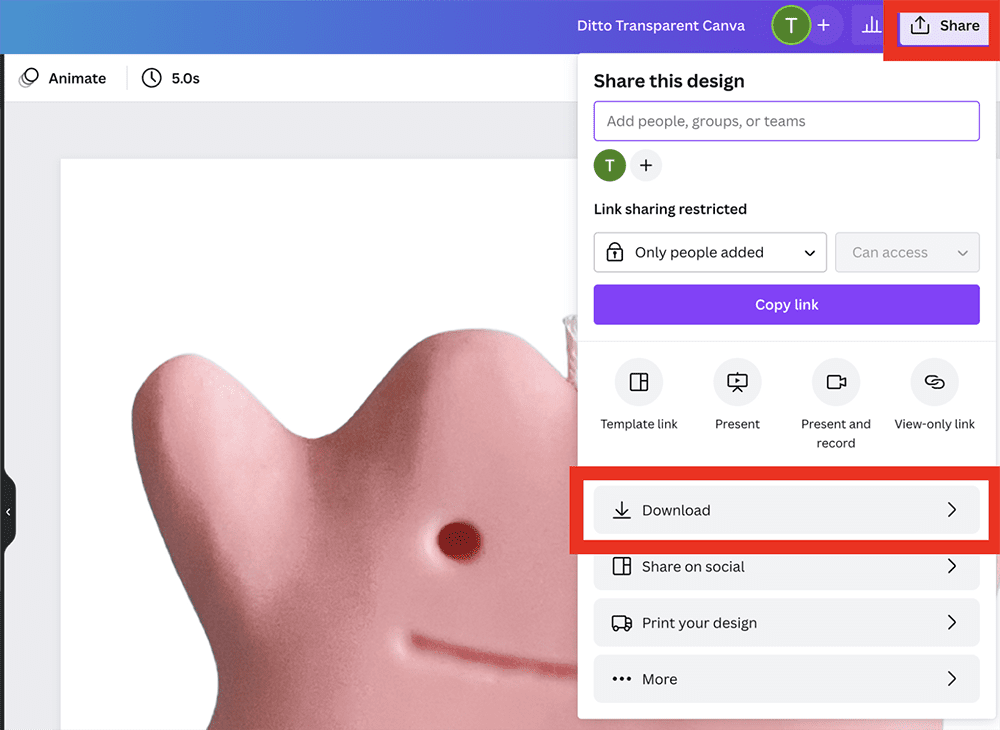
After you click "Download" your image download settings will pop up.
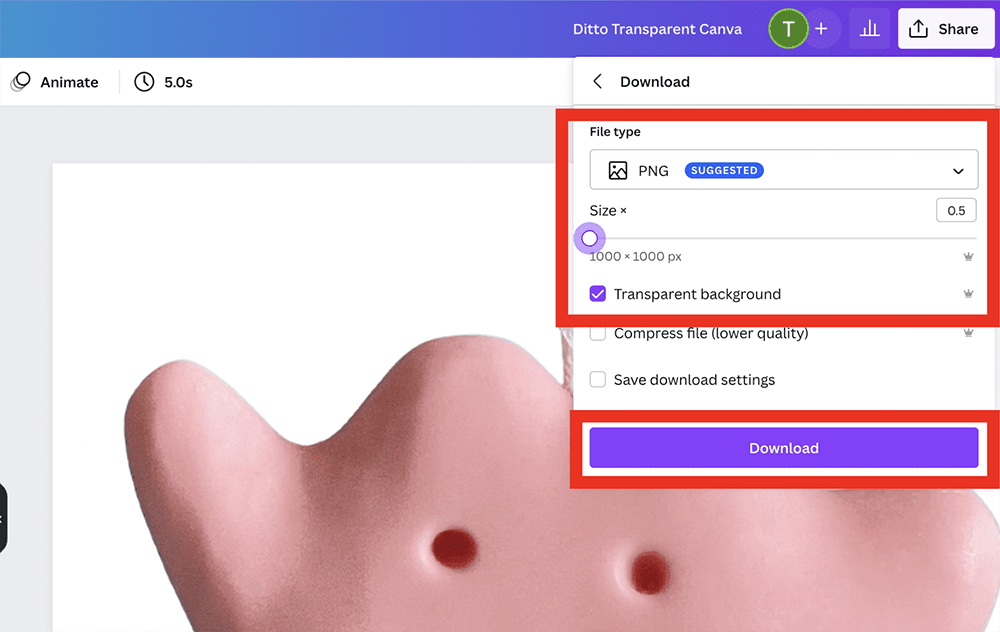
In these setting you'll want to make sure you've done the following:
- Set "PNG" as your file type.
- Set your final image dimensions. In this case I've chosen to reduce the size of my image from 2000px by 2000px to 1000px by 1000px.
- Ensure "Transparent background" box is checked.
- Click "Download"
Once you click the final "Download" button your .png file will automatically start downloading to your computer.
My best suggestion after the download is complete is to move your final image into the project folder you are working on for this specific job.
That way the image remains organised & accessable at all times.
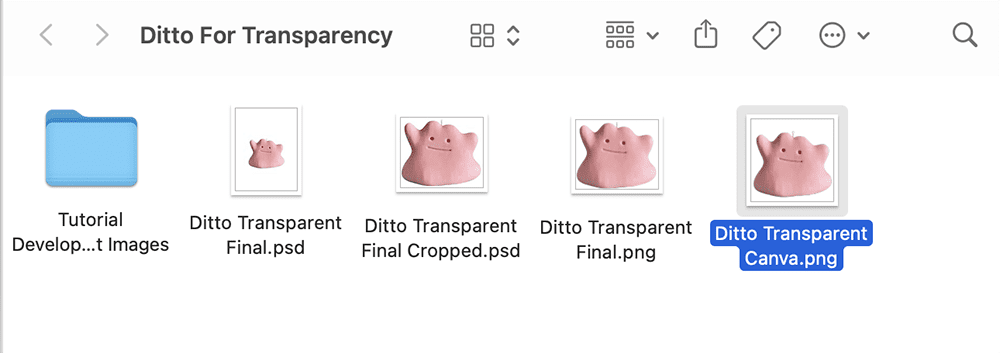
And that's pretty much how to remove backgrounds on Canva. To check the final result, just double click the image from your desktop and the final .png image will reveal itself.

Conclusion
Congratulations on making it to the end of this tutroial!
Regardless of which software you ended up using to make your background transparent, you should now have a .png file of your subject that looks clear, professional and ready to use!
It's clear that both Canva & Photoshop both do a great job when it comes to removing the background of an image.
As mentioned previously, your choice of software should really be based on your overall needs.
If you enjoyed reading this post and found it helpful in removing your background please remember to give it a share using the social icons above or below.
If you have any feed back on what you did and didn't like about the experience, I'd love to hear from you in the comments so I can make better software tutorials in the future!
If you'd like to keep up with me on social media, click the "Subscribe" button below to keep up with me over on YouTube.

(Click to Subscribe)